iOS 프로그래밍 기초 (5주) [ first class object , citizen , 클로저]
오늘 보고 넘어갈것들
- 1급 객체 ( first class object)
- 1급 시민 ( first class citizen)
- 클로저
- 함수 복습
1급 객체 ( first class object), 1급 시민 ( first class citizen)
https://en.wikipedia.org/wiki/First-class_citizen
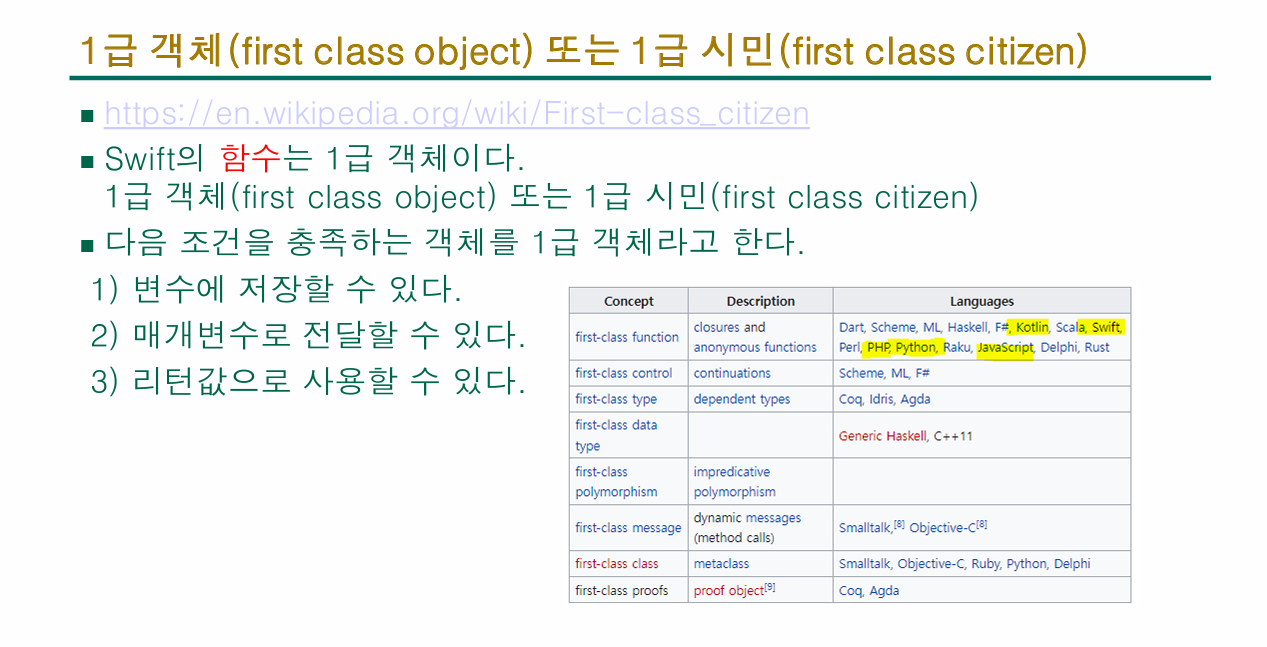
1급 객체 혹은 1급 시민이라 불리는것은 다음 3가지 조건을 만족해야 가능하다.
1. 변수에 저장이 가능할때
2. 매개변수로 전달가능 할때
3. 리턴값으로 사용할수 있을때
1-1. 변수에 저장하기
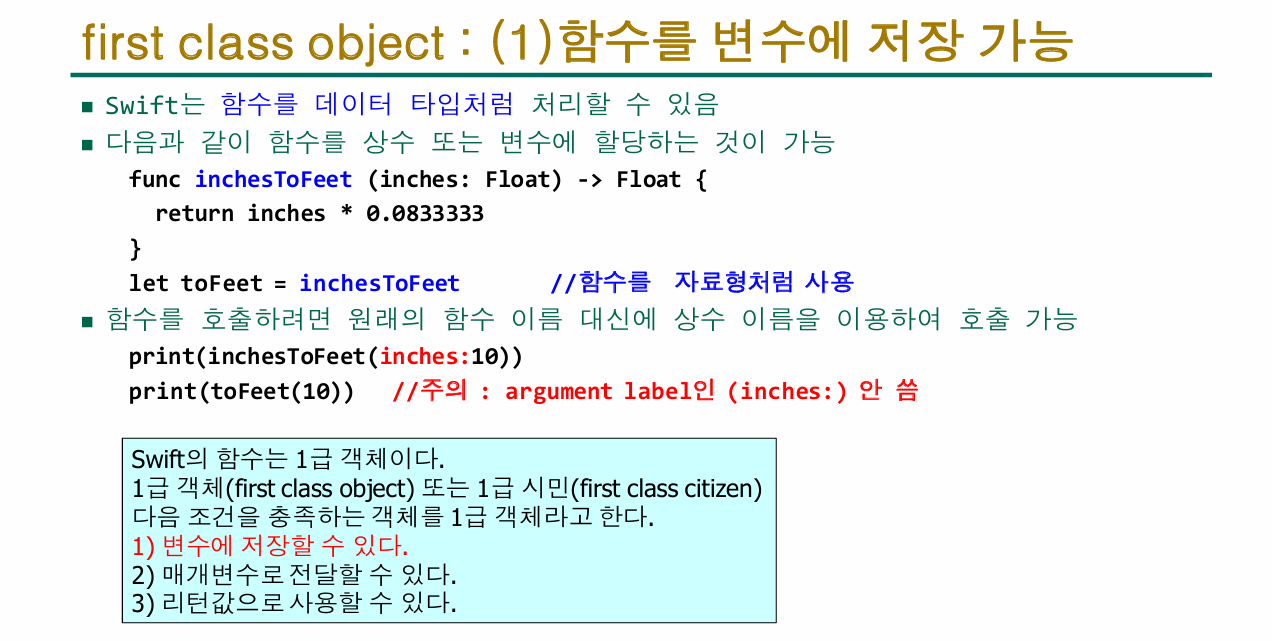
func inchesToFeet (inches: Float) -> Float { //함수
 return inches * 0.0833333
 }
 let toFeet = inchesToFeet //함수를 변수에 넣기

print(inchesToFeet(inches:10)) // 0.833333
print(toFeet(10)) // 0.833333

//주의 : argument label인 (inches:) 안 씀
//함수를 자료형처럼사용
1-2. 매개변수로 전달하기
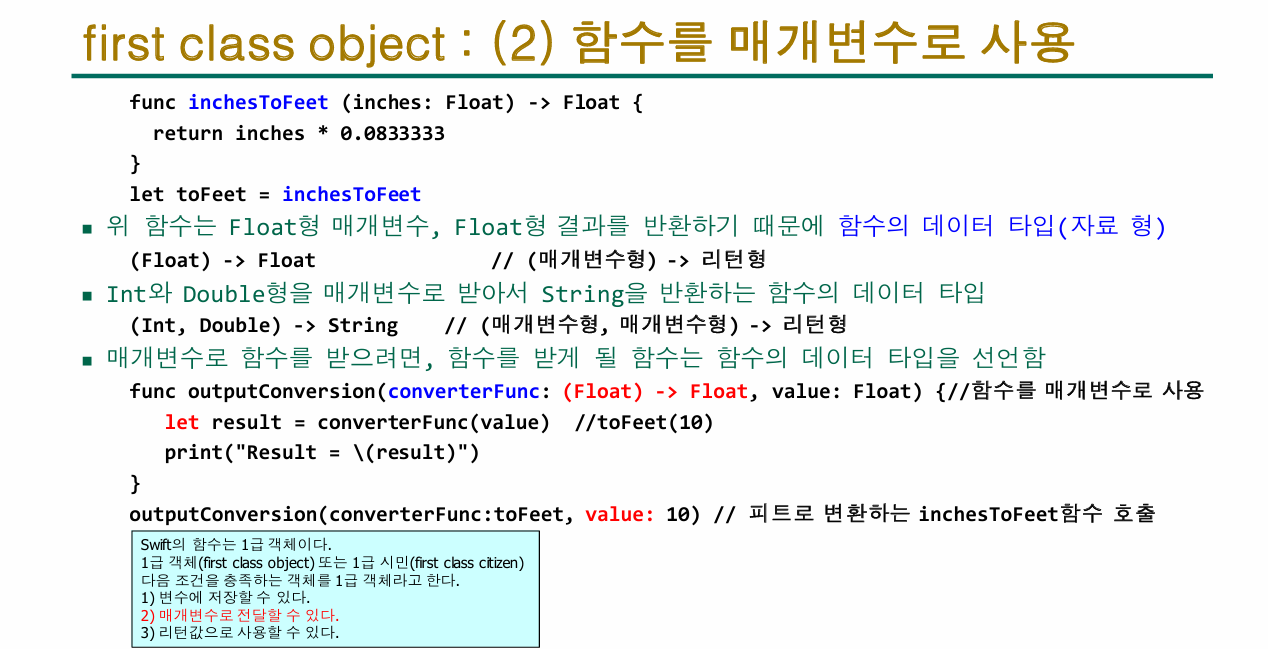
func inchesToFeet (inches: Float) -> Float {
 return inches * 0.0833333
 }
 let toFeet = inchesToFeet

//(Float) -> Float , 쓰는거 아님               // (매개변수형) -> 리턴형
//(Int, Double) -> String , 이것도 쓰는거 아님 // (매개변수형, 매개변수형) -> 리턴형

func outputConversion(converterFunc: (Float) -> Float, value: Float)
{
   let result = converterFunc(value)  //toFeet(10)
   print("Result = \(result)")
}
outputConversion(converterFunc:toFeet, value: 10) // 피트로 변환하는 inchesToFeet함수
// Result : 0.833333
1-3. 함수를 리턴값으로 사용
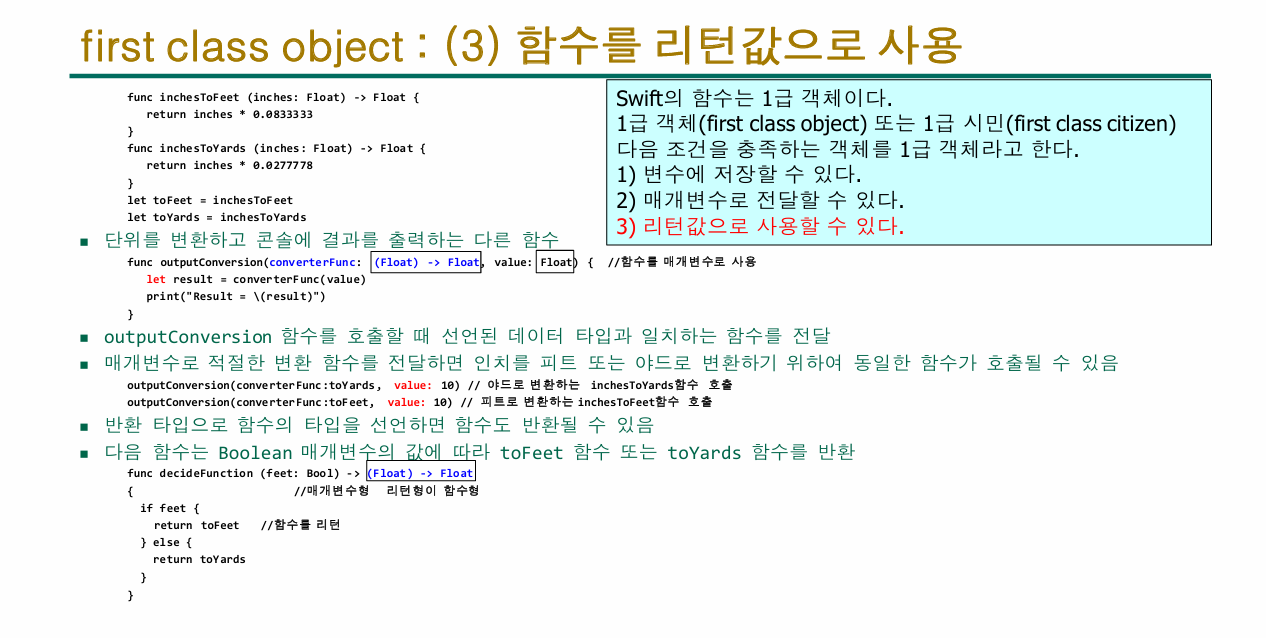
func inchesToFeet (inches: Float) -> Float
{ return inches * 0.0833333 }

func inchesToYards (inches: Float) -> Float
{ return inches * 0.0277778 }
 let toFeet = inchesToFeet
 let toYards = inchesToYards

func outputConversion(converterFunc: (Float) -> Float, value: Float) //함수를 매개변수로
{
   let result = converterFunc(value)
   print("Result = \(result)")
}

outputConversion(converterFunc:toYards, value: 10) //야드 변환
outputConversion(converterFunc:toFeet, value: 10) //피트 변환

func decideFunction (feet: Bool) -> (Float) -> Float
{
  if feet
  { return toFeet } //리턴형이 함수형으로 됨
  else
  { return toYards }
}
// Result = 0.277778
// Result = 0.833333
1-4. 함수를 이용한 일급 객체 요약
func up(num: Int) -> Int
{ return num + 1 }

func down(num: Int) -> Int
{ return num - 1 }

let toUp = up     // 함수를 변수에 넣기
print(up(num:10)) // 11
print(toUp(10))   // 11
let toDown = down

func upDown(Fun: (Int) -> Int, value: Int) // 매개변수로 전달
{
  let result = Fun(value)
  print("결과 = \(result)")
}
upDown(Fun:toUp, value: 10)    // 11
upDown(Fun:toDown, value: 10)  // 9

func decideFun(x: Bool) -> (Int) -> Int
{
   if x { return toUp }   // 리턴형이 함수형이 됨
   else { return toDown }
}
 let r = decideFun(x:true)
 print(type(of:r)) // (Int) -> Int
 print(r(10))      // 11
2-1. 클로저(Closure)란?
특정 작업(함수)과 그 작업이 일어난곳(환경이나 상태)을 모두 기억하고 있는 도구
https://en.wikipedia.org/wiki/Closure_(computer_programming)
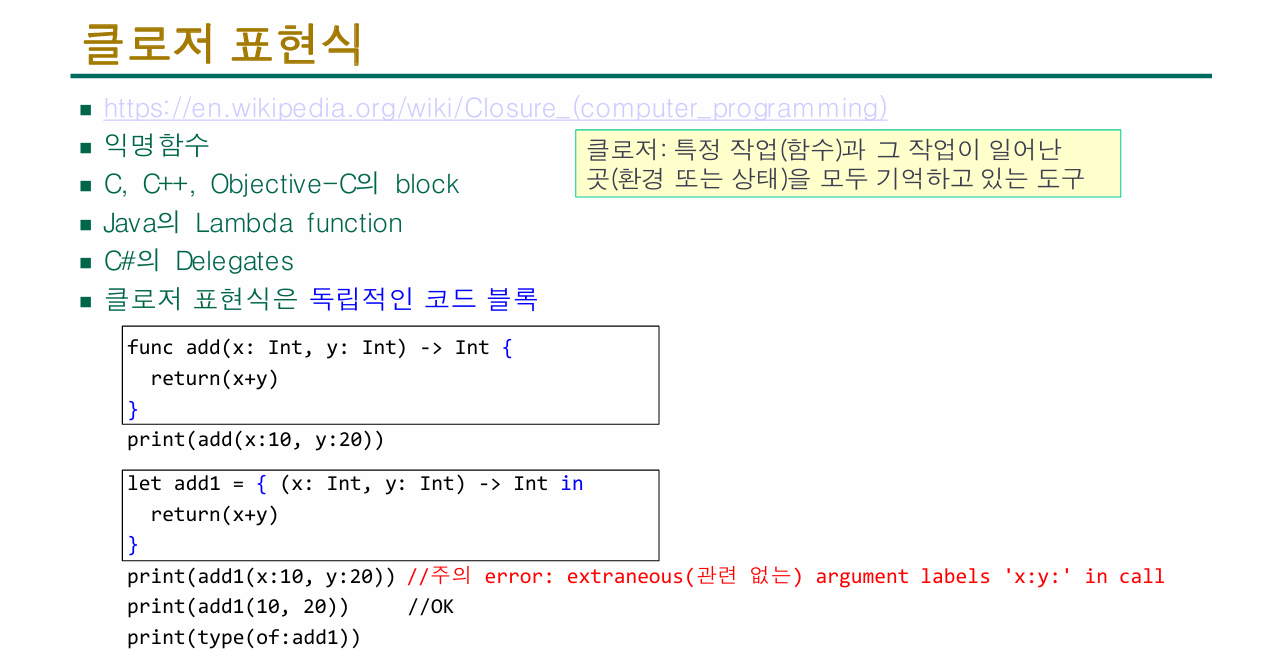
func add(x: Int, y: Int) -> Int {
 return(x+y)
 }
 print(add(x:10, y:20)) // 30
 let add1 = { (x: Int, y: Int) -> Int in
 return(x+y)
 }
 //print(add1(x:10, y:20)) //주의 error: extraneous argument labels 'x:y:' in call
 print(add1(10, 20))    //30
 print(type(of:add1))   // (Int , Int) -> Int
2-2. 클로저 표현식
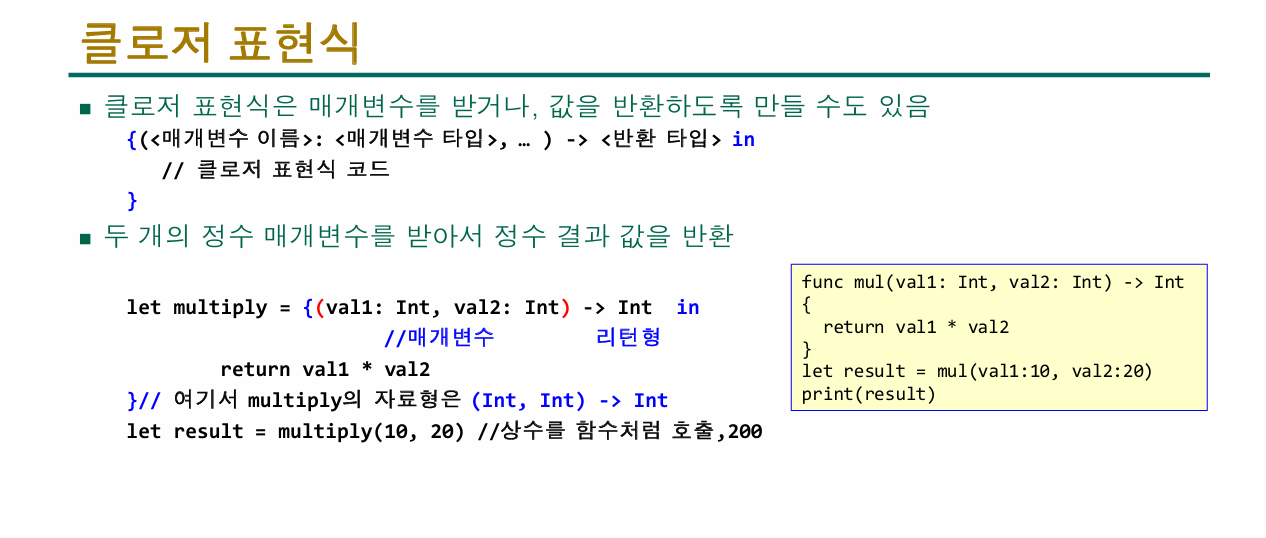
let multiply = {(val1: Int, val2: Int)-> Int in
return val1 * val2
 }// 여기서 multiply의 자료형은 (Int, Int) -> Int
 let result = multiply(10, 20)
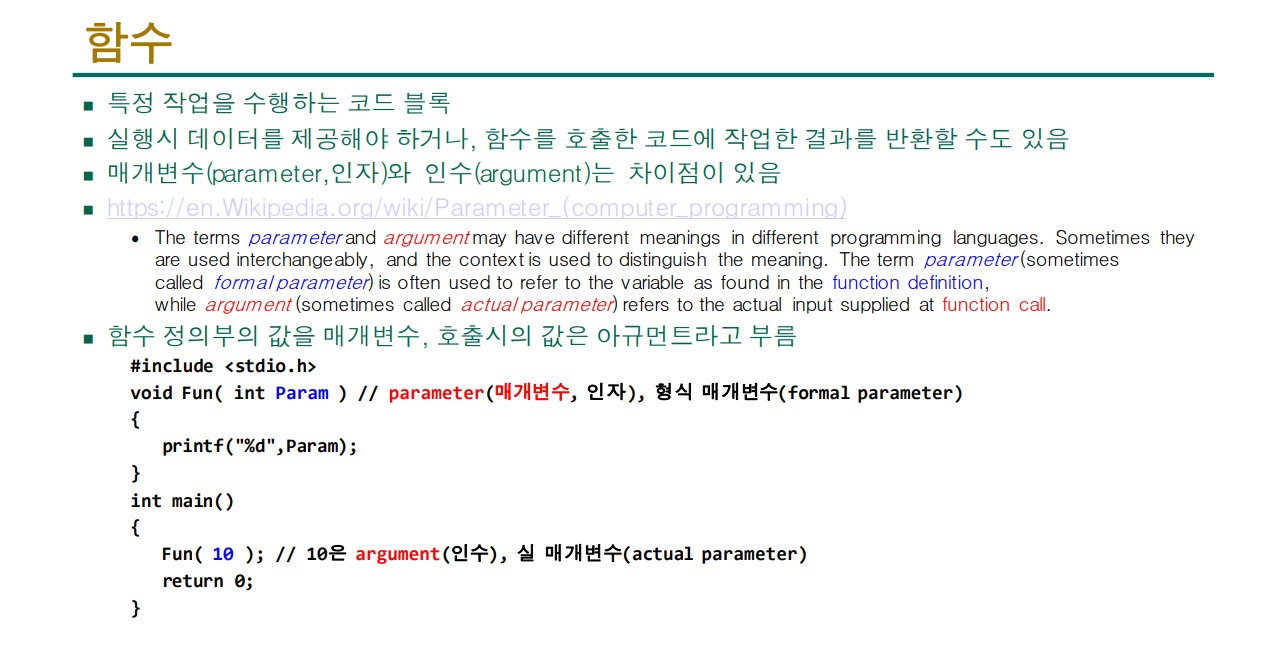
3-1. 함수 복습
영문 번역본
The terms parameter and argument may have different meanings in different programming languages.
Sometimes they are used interchangeably, and the context is used to distinguish the meaning.
매개 변수와 인수라고 하는 용어는 프로그래밍 언어마다 다른의미를 가질수 있습니다.
때로는 서로 교환하여 사용할수도 있고, 문맥의 의미를 구분하는데에도 쓰일수 있습니다.
The term parameter(sometimes called formal parameter) is often used to refer to the variable as found in the function definition, while argument (sometimes called actual parameter) refers to the actual input supplied at function call.
매개변수는 (형식 매개변수) 용어는 때때로 함수 정의에서 볼수 있는 변수를 지칭할때 사용됩니다.
인수(실사용 매개변수)는 함수 호출시 제공되는 실제 입력을 의미합니다.
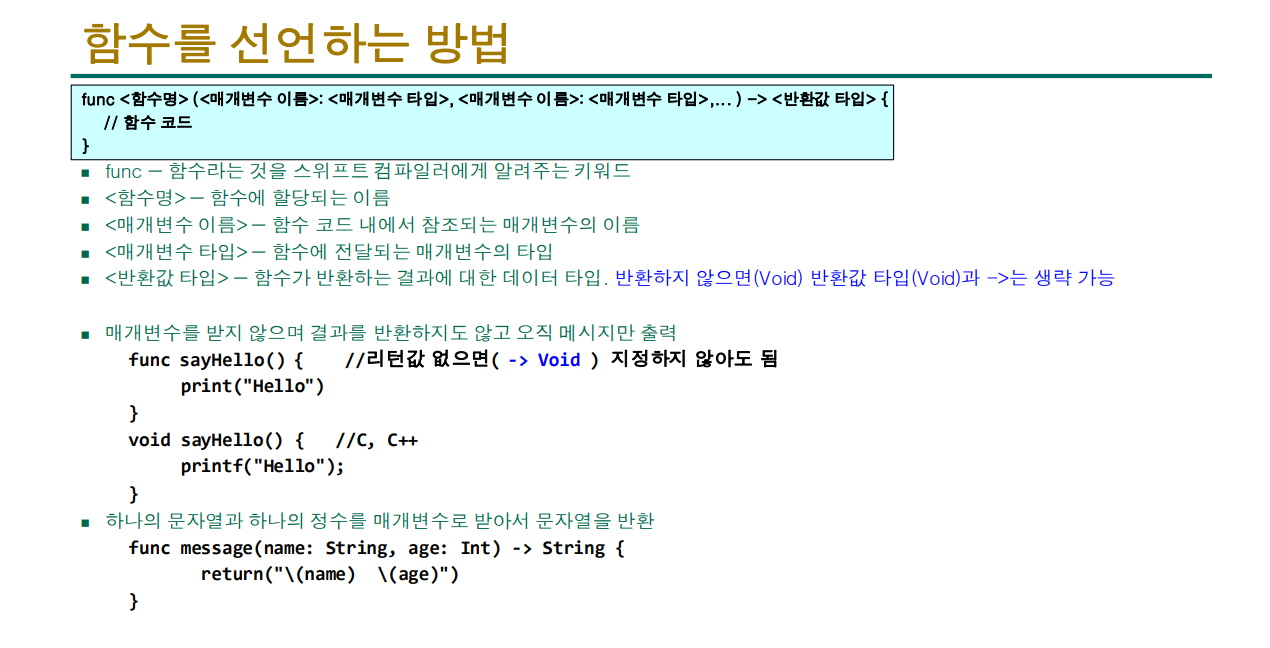
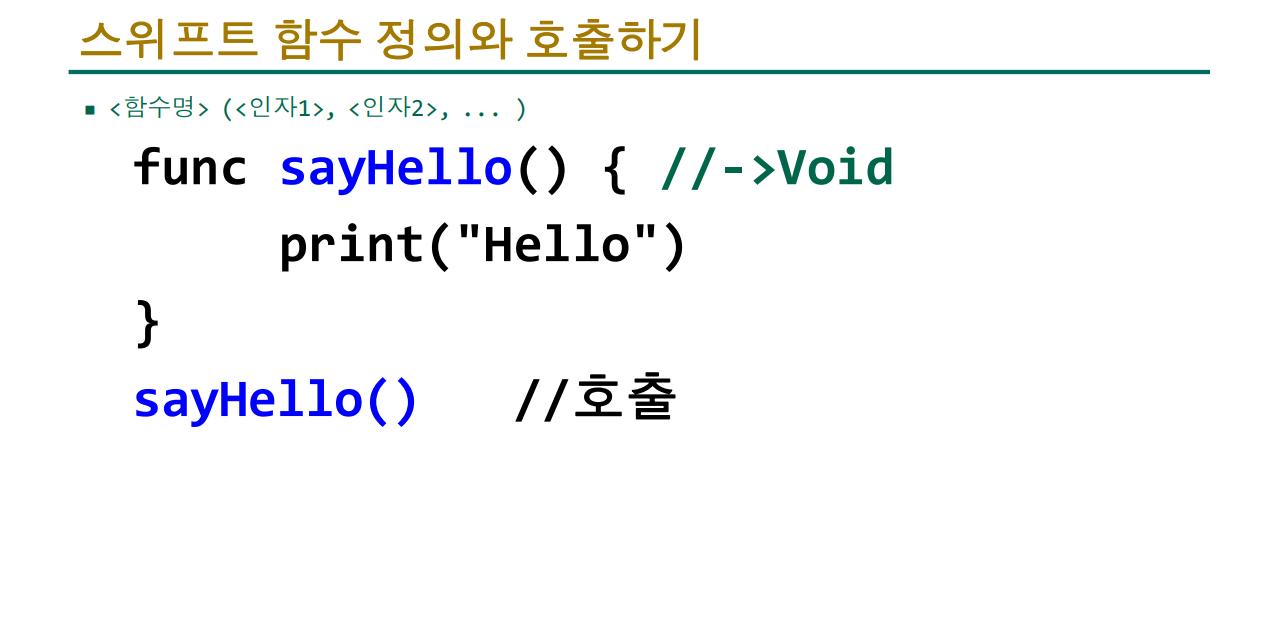
3-2. 함수 선언방법과 정의
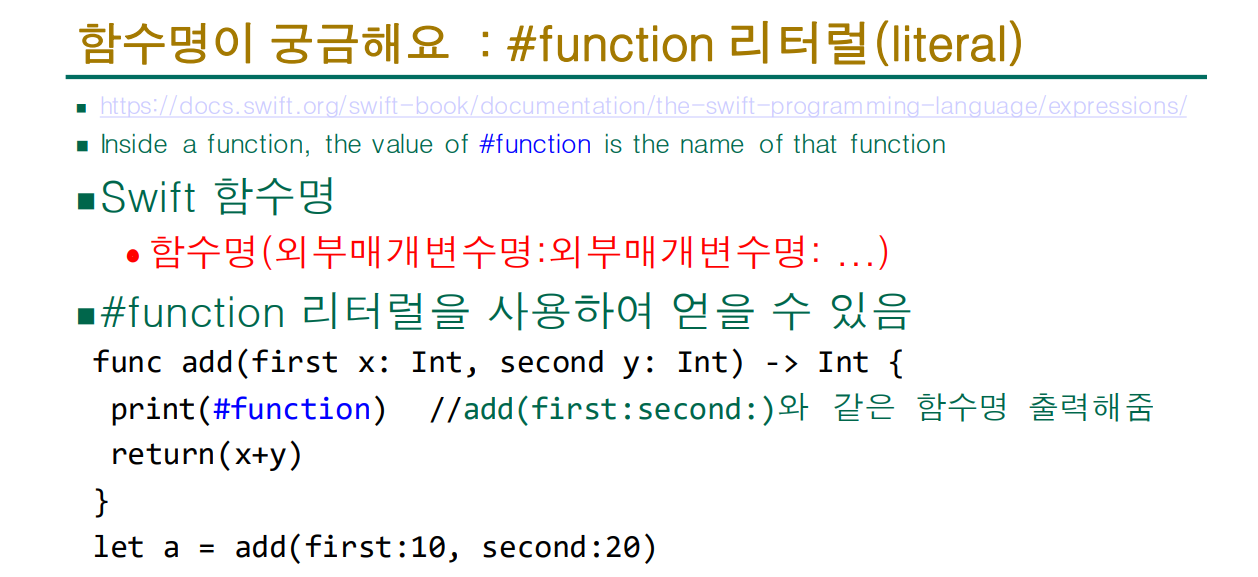
3-3. 함수명이 궁금하다면? (#function) 사용
3-4. 함수 심화1 : BMI 계산
코드를 올려드릴테니 자유롭게 실행해보시면 됩니다.
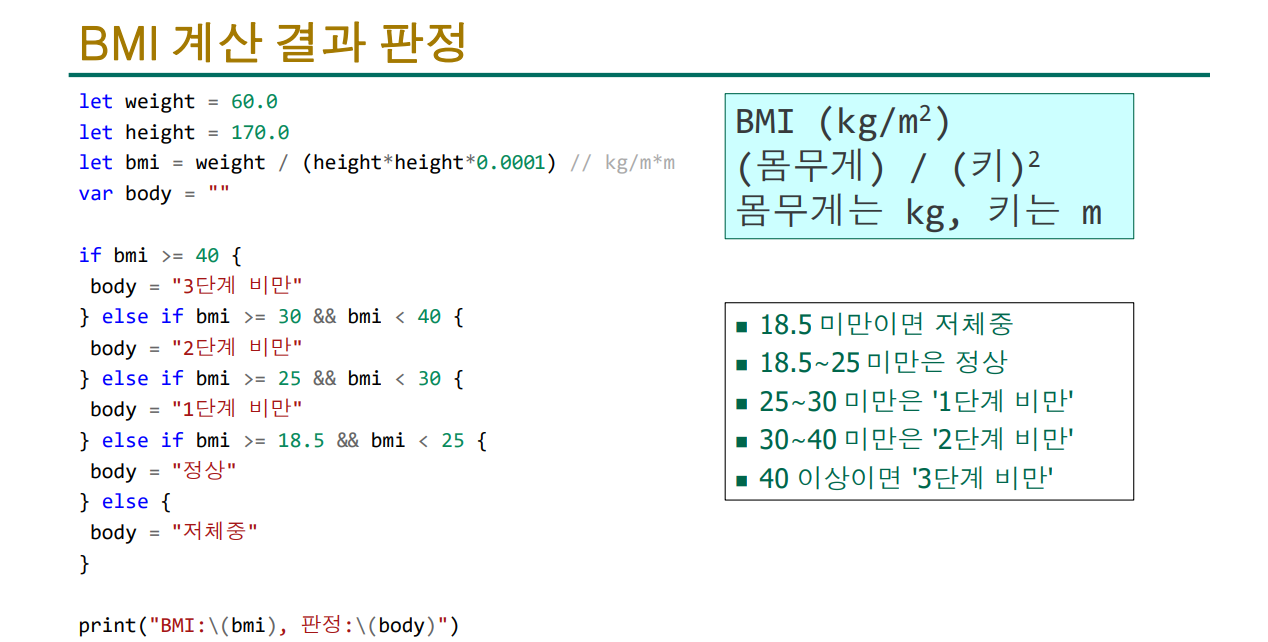
let weight = 60.0
let height = 170.0
let bmi = weight / (height*height*0.0001) // kg/m*m
var body = ""

if bmi >= 40 {
body = "3단계 비만"
} else if bmi >= 30 && bmi < 40 {
body = "2단계 비만"
} else if bmi >= 25 && bmi < 30 {
body = "1단계 비만"
} else if bmi >= 18.5 && bmi < 25 {
body = "정상"
} else {
body = "저체중"
}
print("BMI:\(bmi), 판정:\(body)")
3-5. 함수 심화2 : BMI 계산 + Swift 문자열 서식 (swift string format)
문자열 서식 관련
참고사이트 1
참고사이트 2
https://developer.apple.com/documentation/swift/string
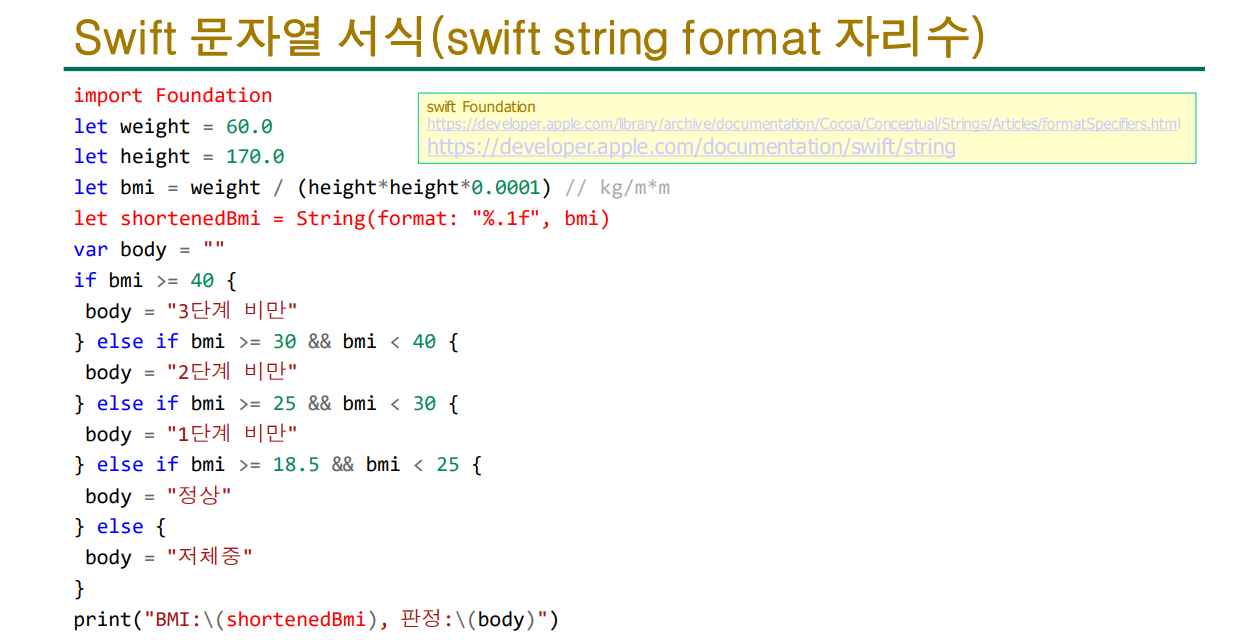
import Foundation
let weight = 60.0
let height = 170.0
let bmi = weight / (height*height*0.0001) // kg/m*m
let shortenedBmi = String(format: "%.1f", bmi)
var body = ""
if bmi >= 40 {
body = "3단계 비만"
} else if bmi >= 30 && bmi < 40 {
body = "2단계 비만"
} else if bmi >= 25 && bmi < 30 {
body = "1단계 비만"
} else if bmi >= 18.5 && bmi < 25 {
body = "정상"
} else {
body = "저체중"
}
print("BMI:\(shortenedBmi), 판정:\(body)")
3-6. 함수 심화3 : BMI 계산 + calcBMI() 함수
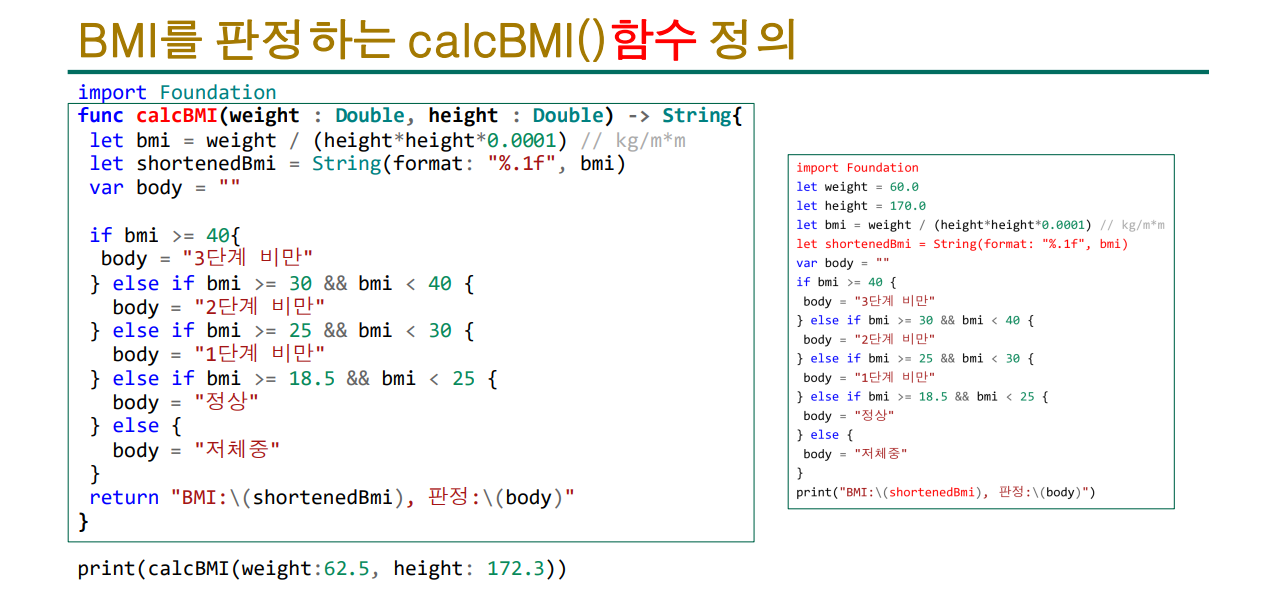
import Foundation
func calcBMI(weight : Double , height : Double)-> String{
let bmi= weight/ (height*height*0.0001) // kg/m*m
let shortenedBmi= String(format: "%.1f", bmi)

var body= ""if bmi >= 40
{ body= "3단계 비만" }
else if bmi >= 30 && bmi< 40
{ body= "2단계 비만" }
else if bmi >= 25 && bmi< 30
{ body= "1단계 비만" }
else if bmi >= 18.5 && bmi< 25
{ body="정상" }
else
{ body="저체중" }

return "BMI:\(shortenedBmi), 판정:\(body)"
}
print(calcBMI(weight:62.5, height : 172.3))
3-7. 함수 심화4 : BMI (switch ~ case) + 판정 결과 리턴 함수
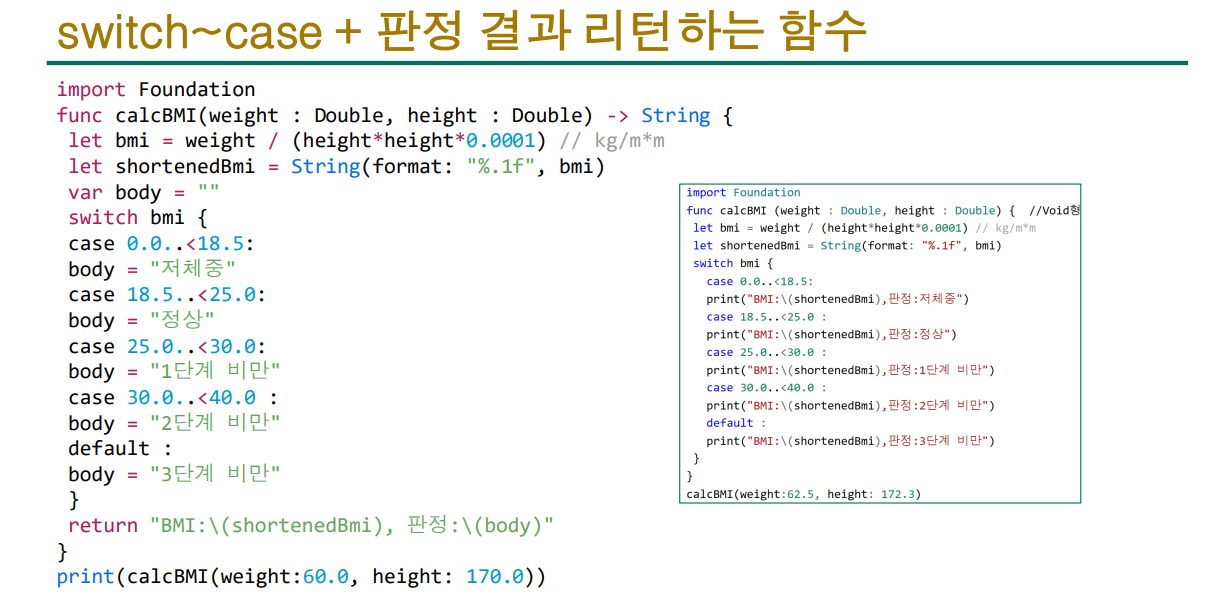
import Foundation
func calcBMI(weight : Double, height : Double) -> String {
let bmi = weight / (height*height*0.0001) // kg/m*m
let shortenedBmi = String(format: "%.1f", bmi)
var body = ""

switch bmi {
case 0.0..<18.5:
body = "저체중"
case 18.5..<25.0:
body = "정상"
case 25.0..<30.0:
body = "1단계 비만"
case 30.0..<40.0 :
body = "2단계 비만"
default :
body = "3단계 비만"
}
return "BMI:\(shortenedBmi), 판정:\(body)"
}
print(calcBMI(weight:60.0, height: 170.0))