이번주에 보고 넘어갈것들
- 프로토콜
- Xcode 기타 편의성
- 맛집 앱만들기용 기초
1-1. 프로토콜 (protocol)

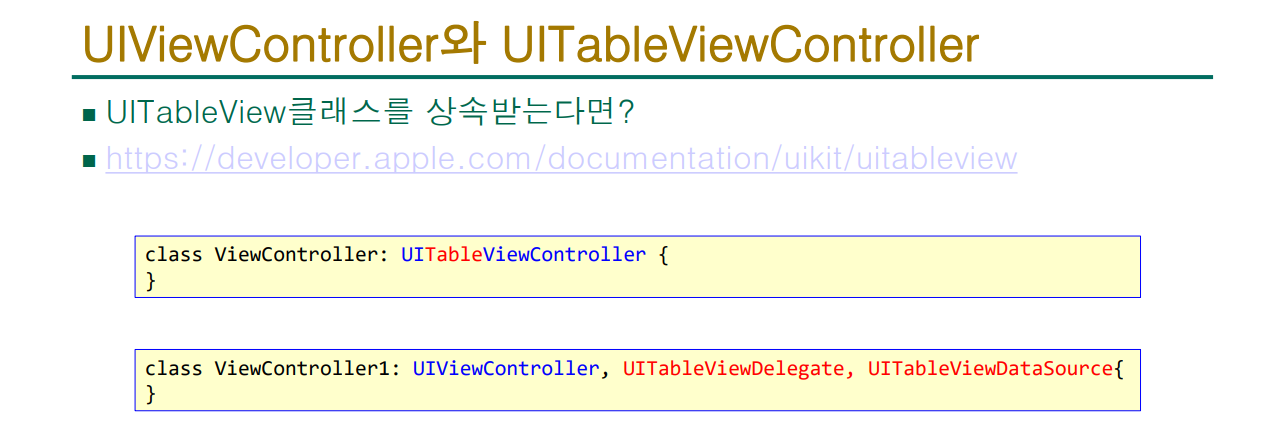
1-2. swift 언어에서의 상속,채택

1-3. 프로토콜 정의
1-4. 프로토콜 채택(adopt)
앱 만들기로 들어가기전에..
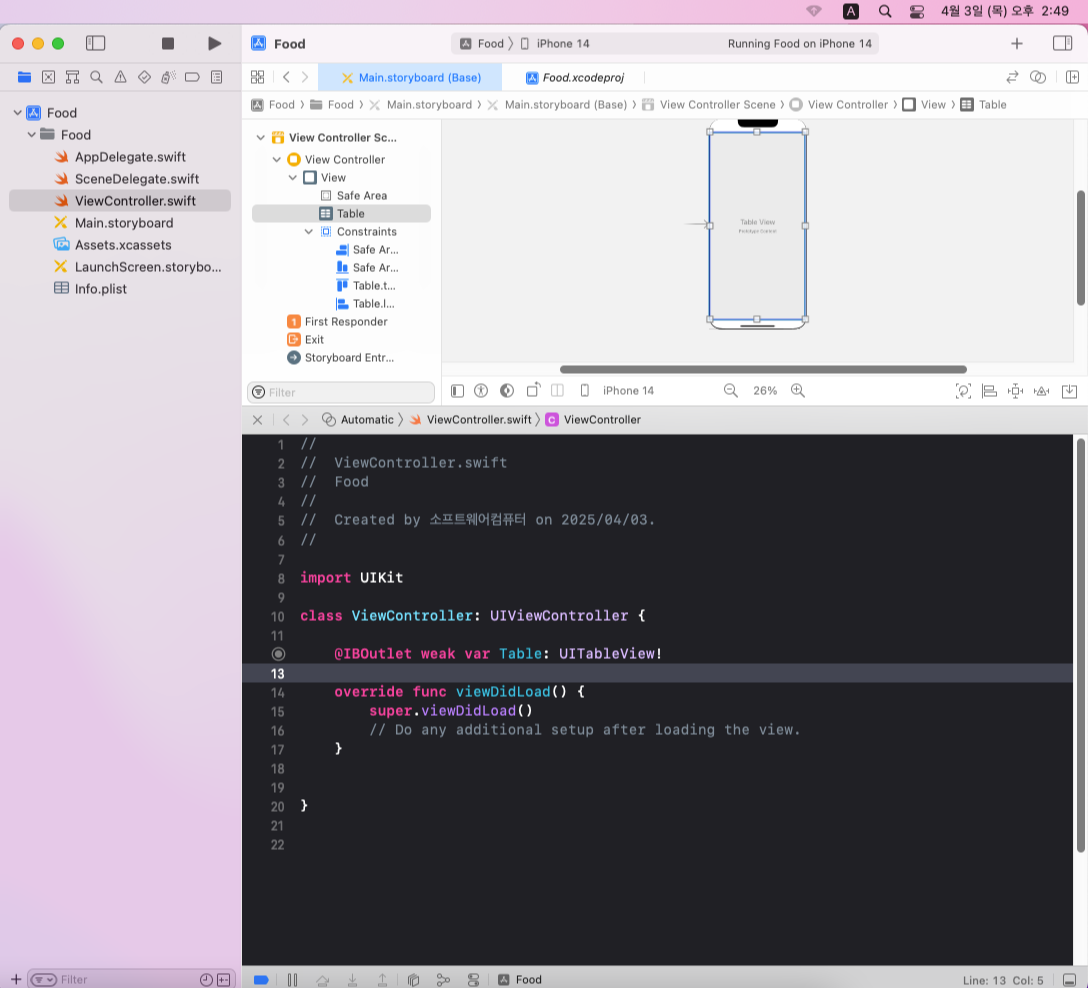
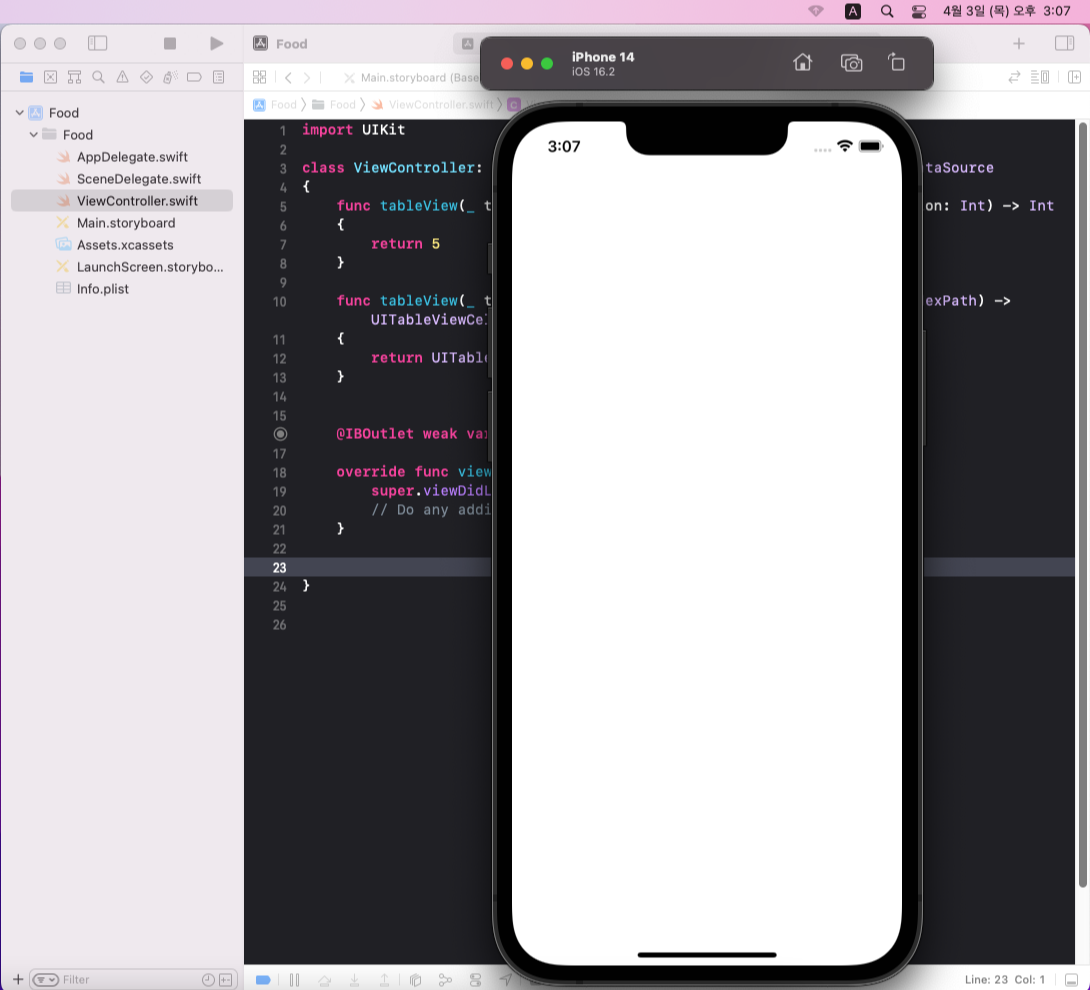
앱을 만들기 위해서 밑에 표시된 두개의 메서드가 반드시 필요
override func tableView(_ tableView: UITableView, numberOfRowsInSection section: Int) -> Int {
return items.count
}
// 특정 섹션에 표시할 행의 개수
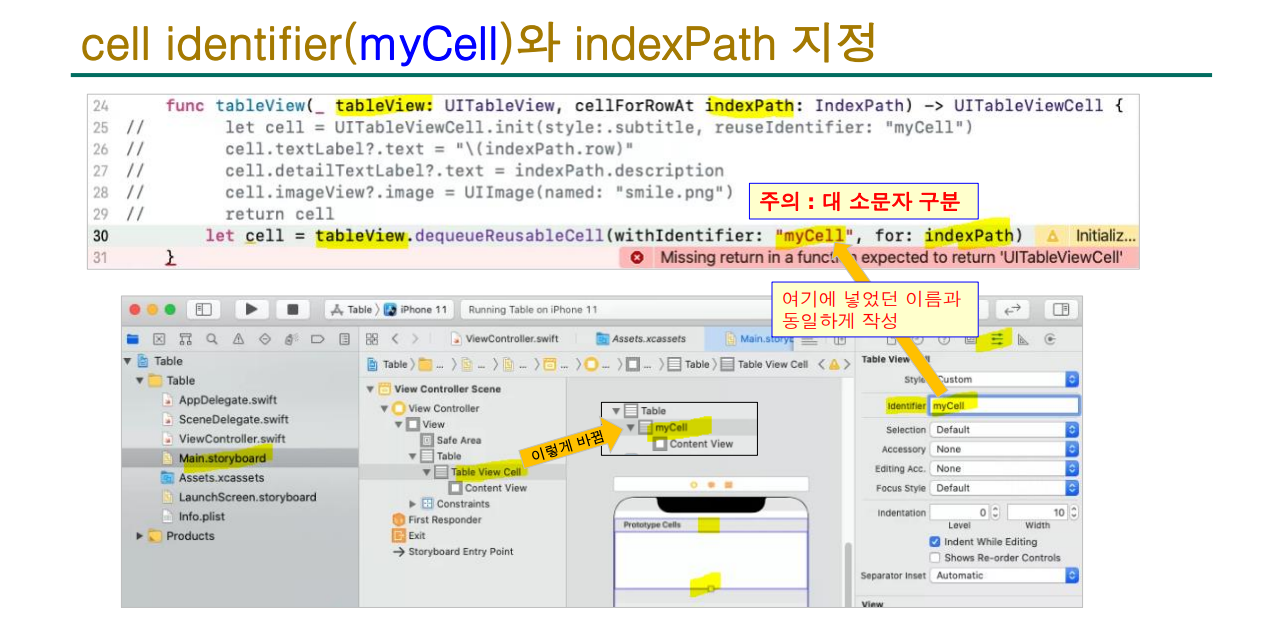
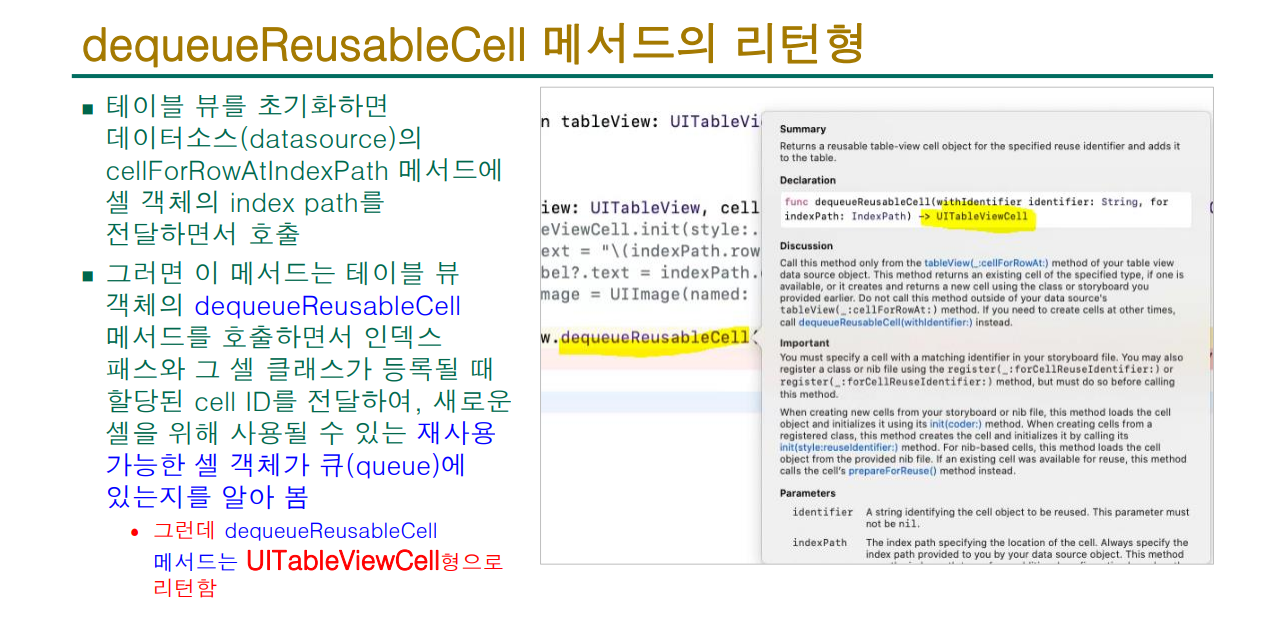
override func tableView(_ tableView: UITableView, cellForRowAt indexPath: IndexPath) -> UITableViewCell {
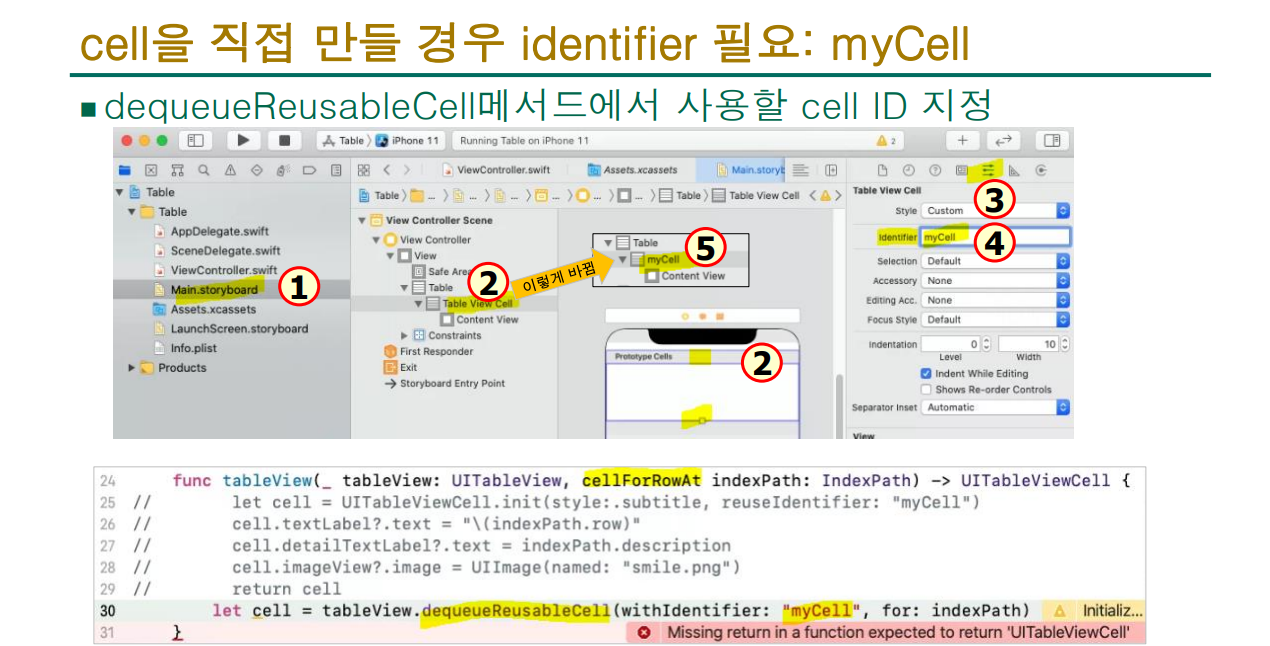
let cell = tableView.dequeueReusableCell(withIdentifier: "cellTypeIdentifier", for: indexPath)
cell.textLabel!.text = "Cell text"
return cell
}
//특정 위치의 셀을 리턴
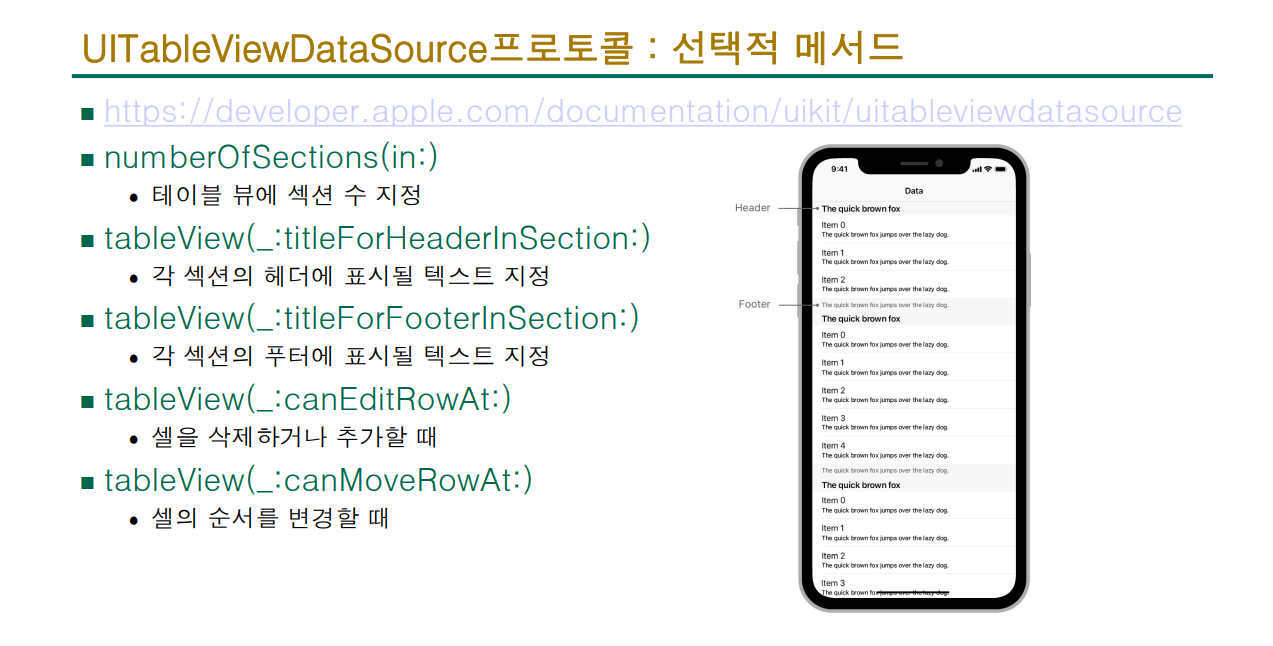
상황에 따라서 밑에 있는 메서드도 활용할수 있습니다
2-1. Xcode 화면
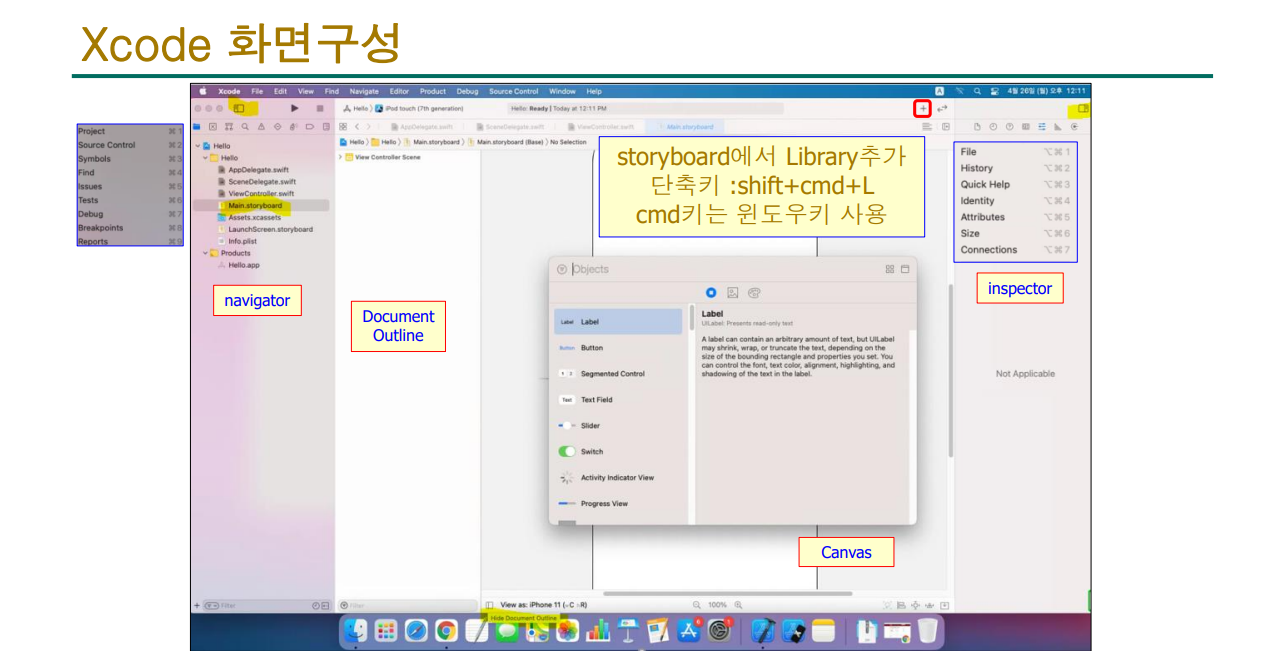
2-1-2. 윈도우 키 + R키를 같이 누르면 시뮬레이터가 켜짐
2-2. 기본적으로 생성되는 소스
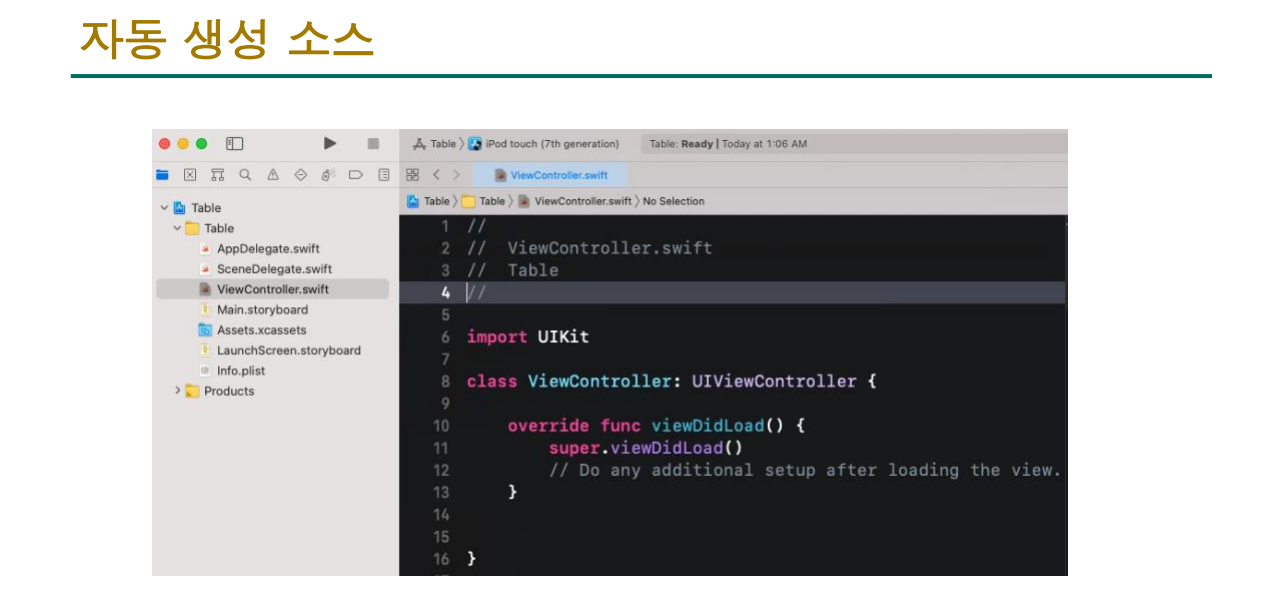
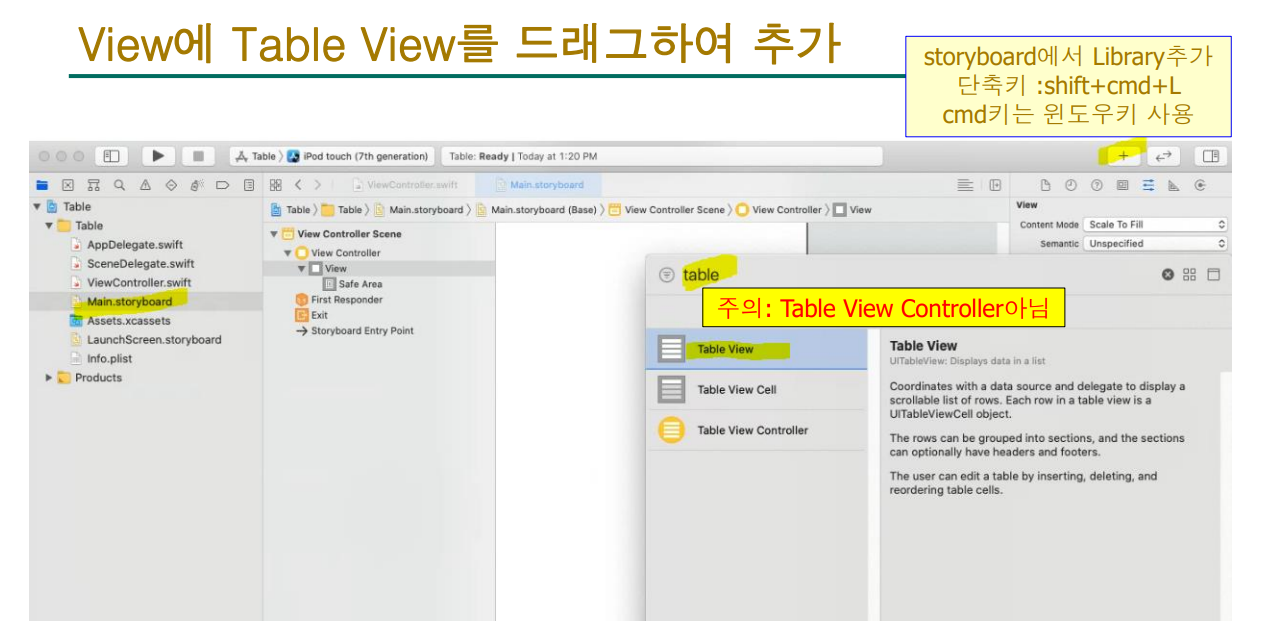
생성한 후에다가 table view를 추가하기
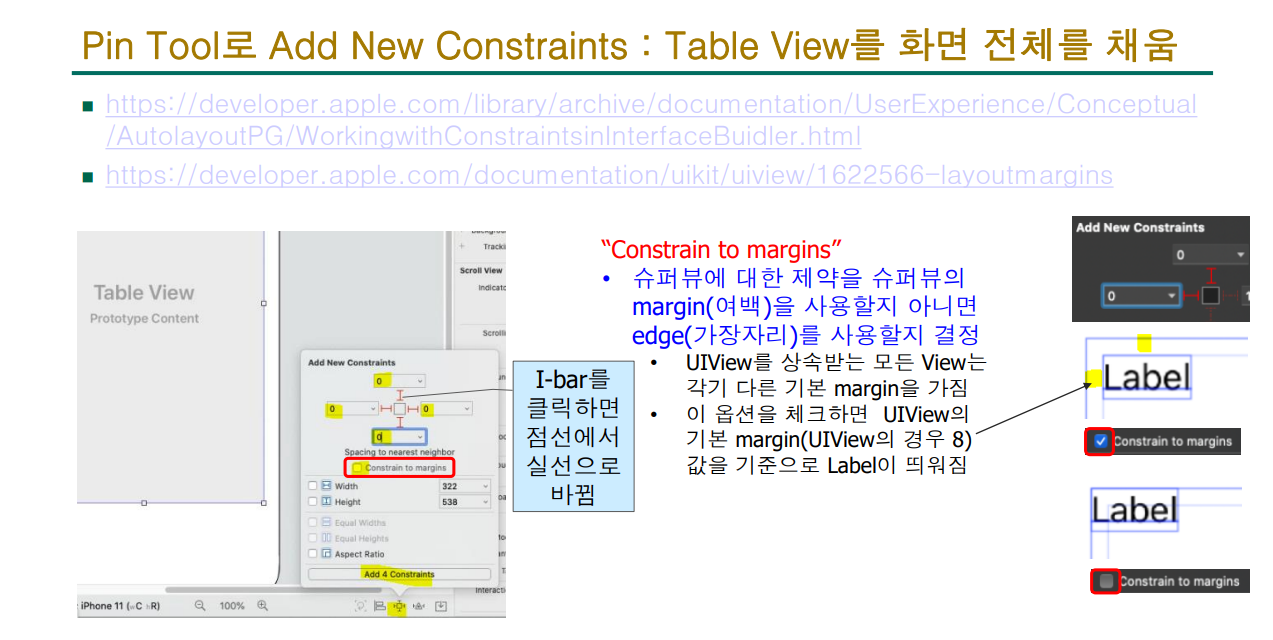
2-3. Pin Tool을 이용해서 화면을 채우기
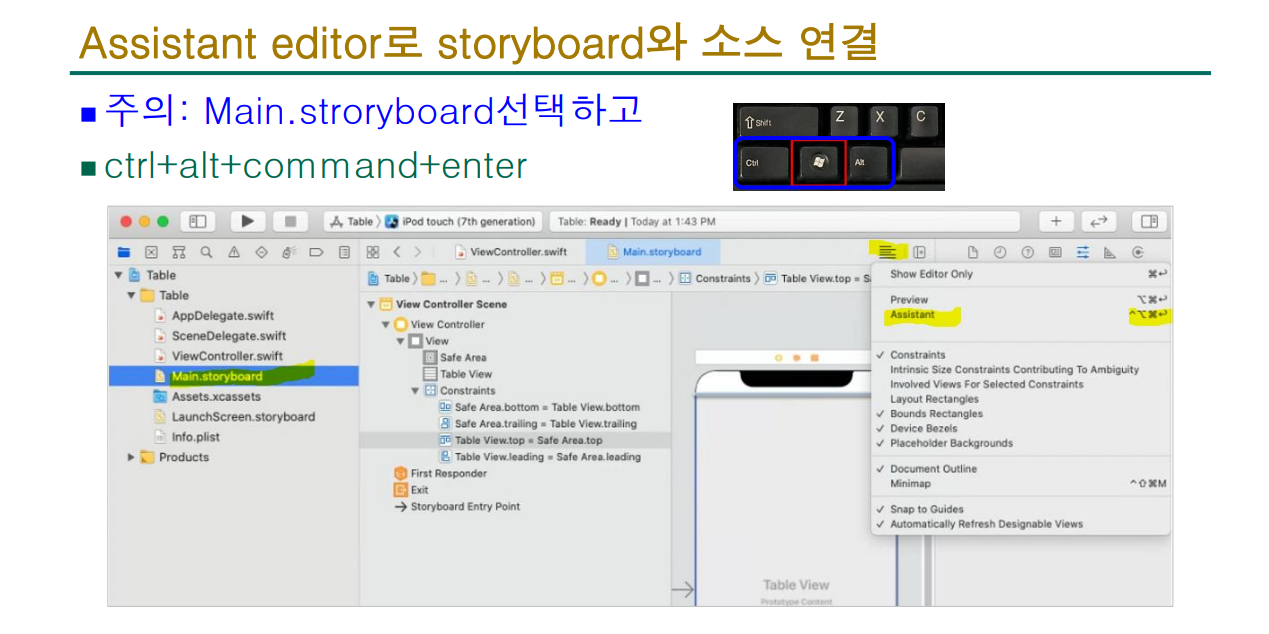
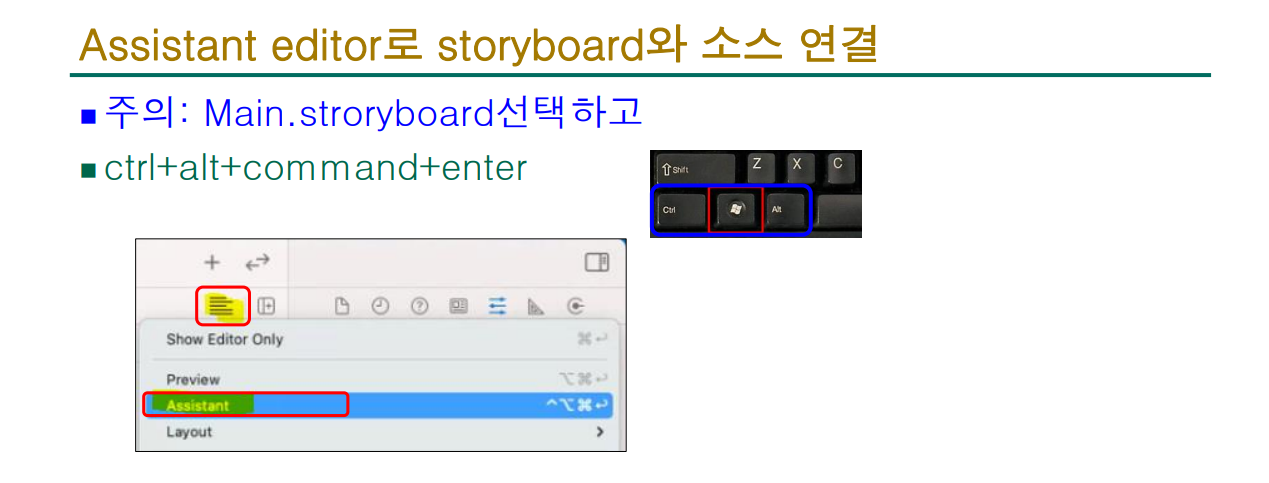
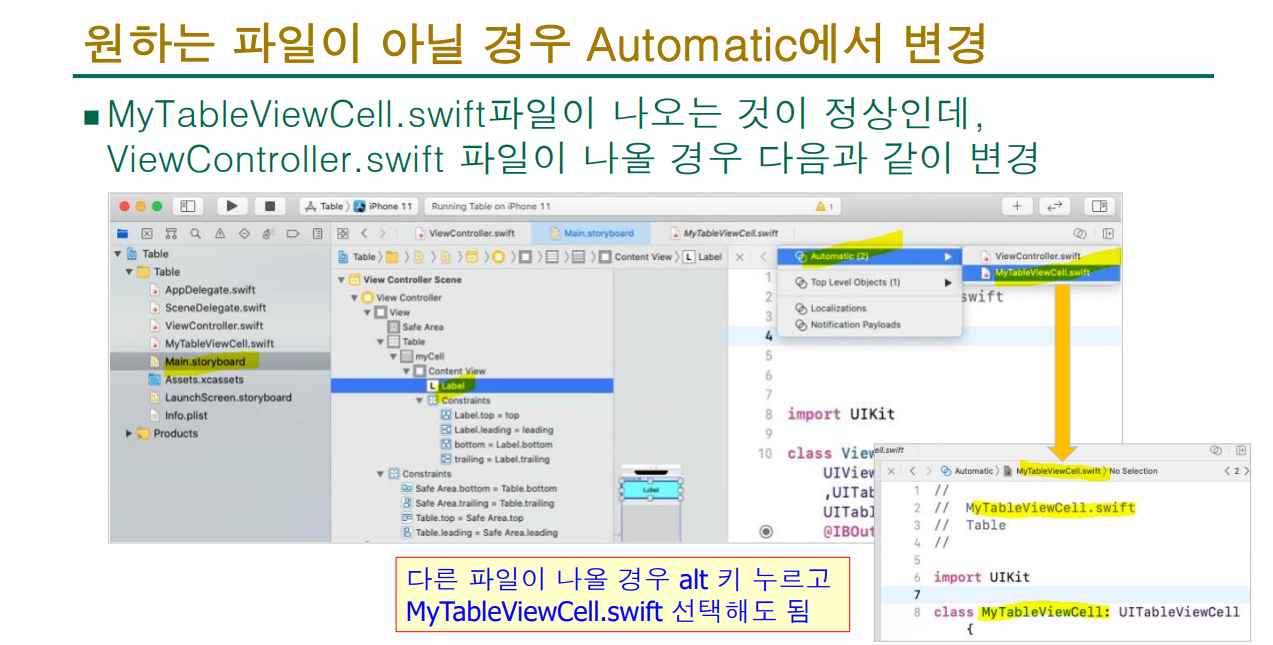
2-4. assistant editor
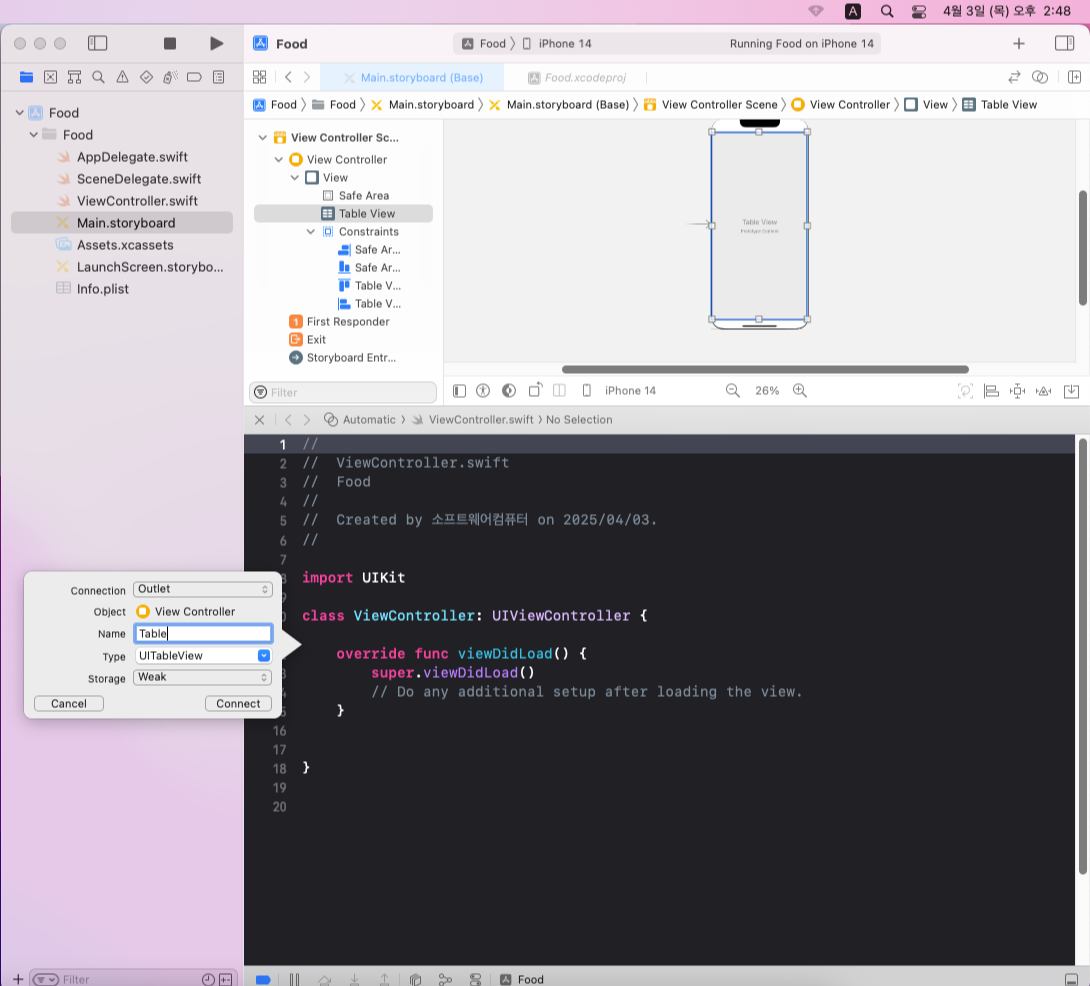
저는 table이라고 적었는데 다르게 적어도 상관은 없습니다.
추가(connect)를 누르면 연결되면서 코드가 바뀝니다.
2-5. Xcode : 프로토콜이 없는데?
https://developer.apple.com/documentation/uikit/uitableview
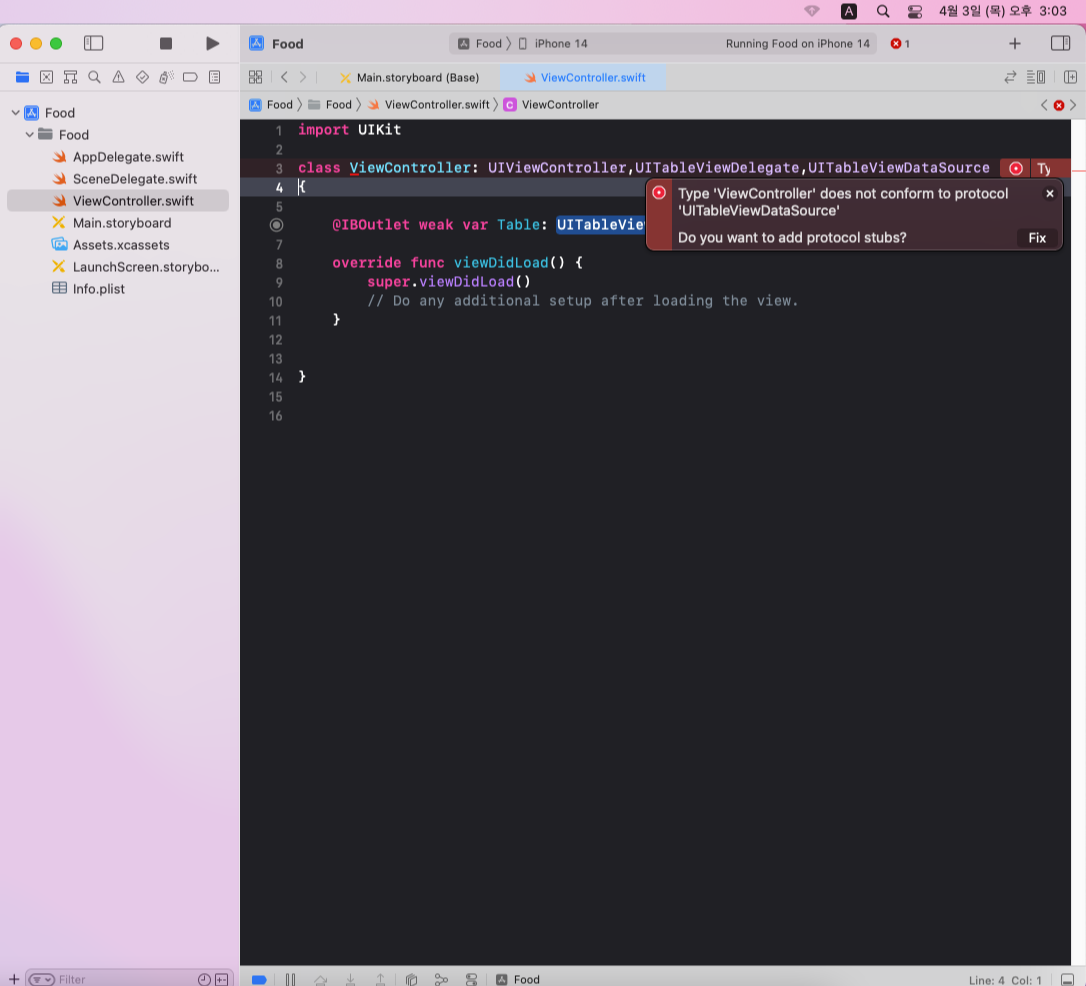
참고로 빨간원에 점 모양으로 뜨면 Xcode에서 고쳐줄수 있다는 이야기이고,
반대로 X로 나온다면 Xcode에서 자체적으로 수정이 불가능하단 이야기를 알려줍니다.
(오류 영문을 번역해도 프로토콜을 준수하지 않는다고 대놓고 알려줍니다.)
아무튼 Xcode에게 고쳐달라고 하면 이렇게 수정해줍니다.

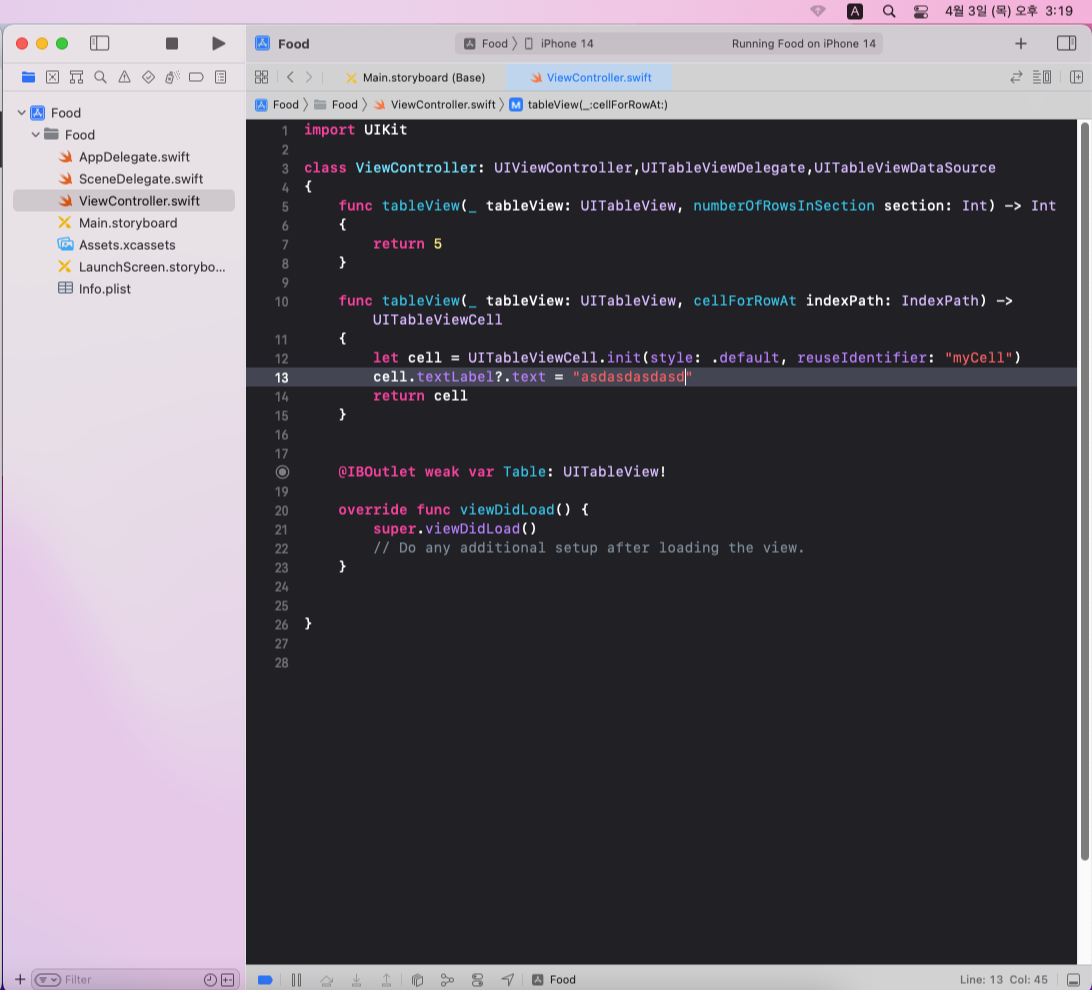
일단은 오류가 안나는지 시험해보기 위해서 대충 땜빵으로 아무거나 넣어주고 실행합니다.
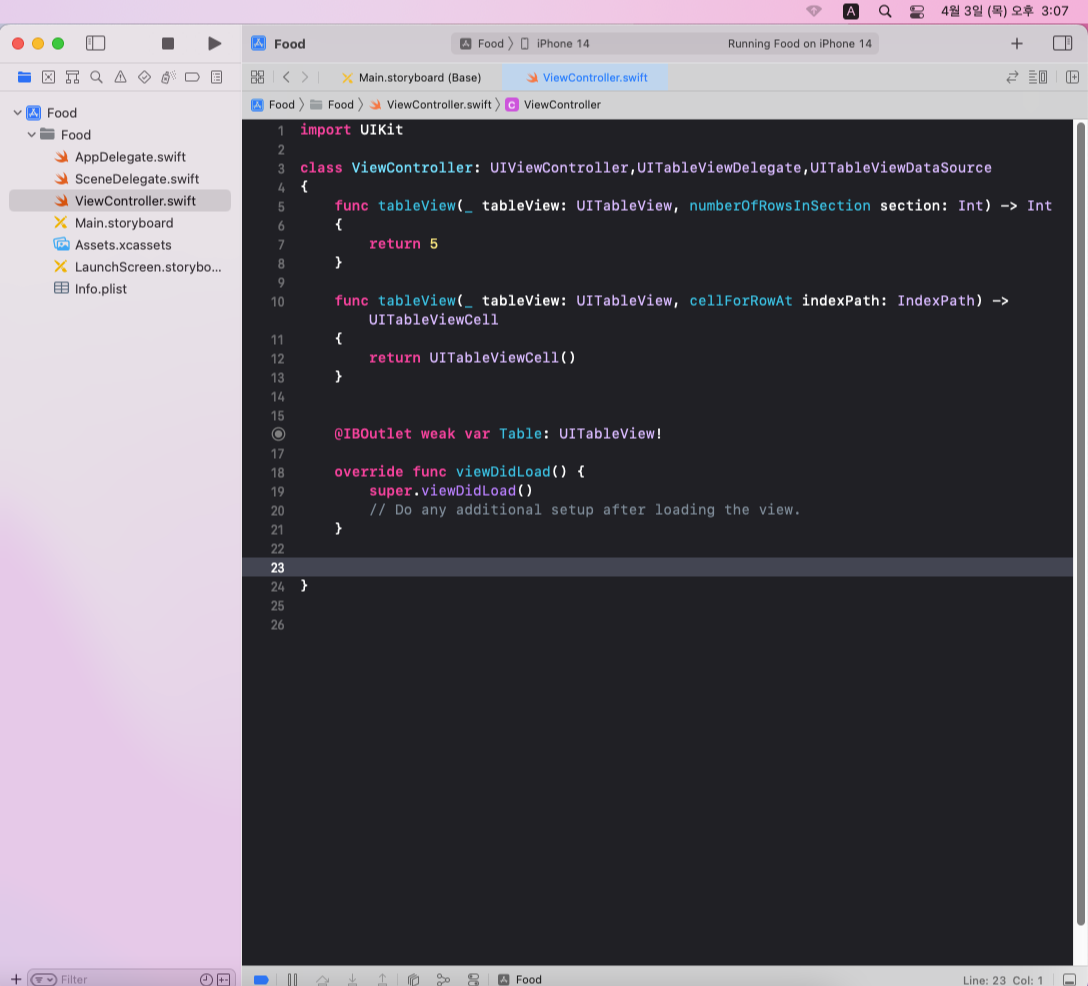
저는 아무것도 안나왔지만, 사람마다 좀 다를수도 있습니다.
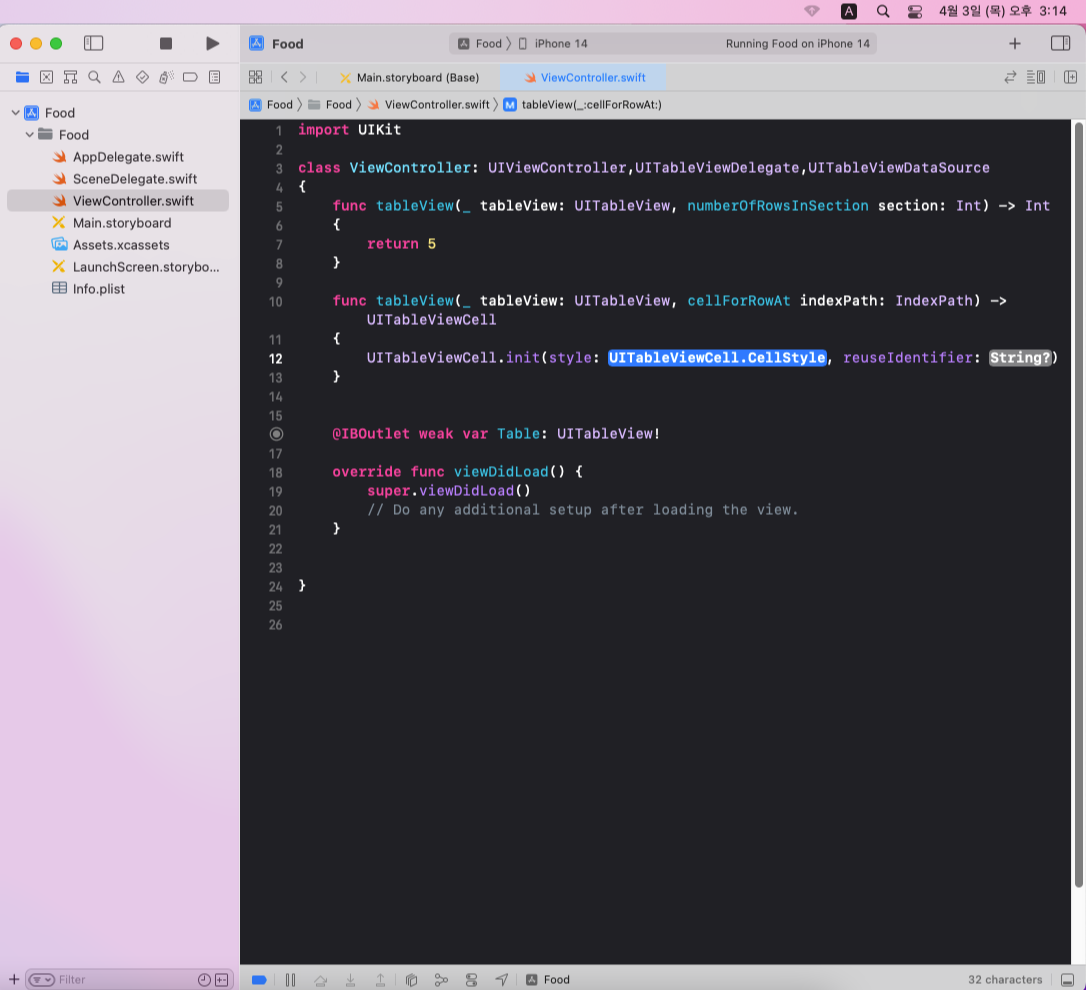
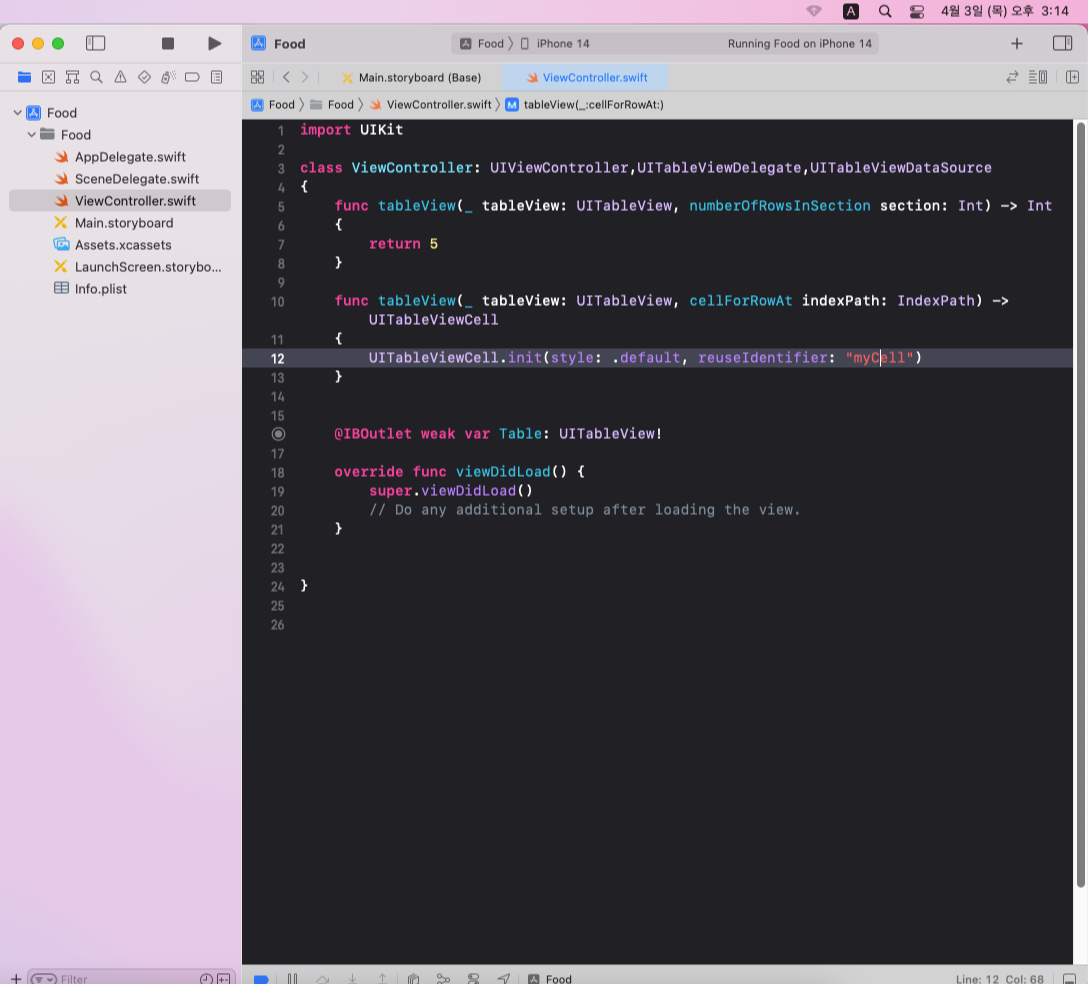
2-6. init()으로 객체 만들기
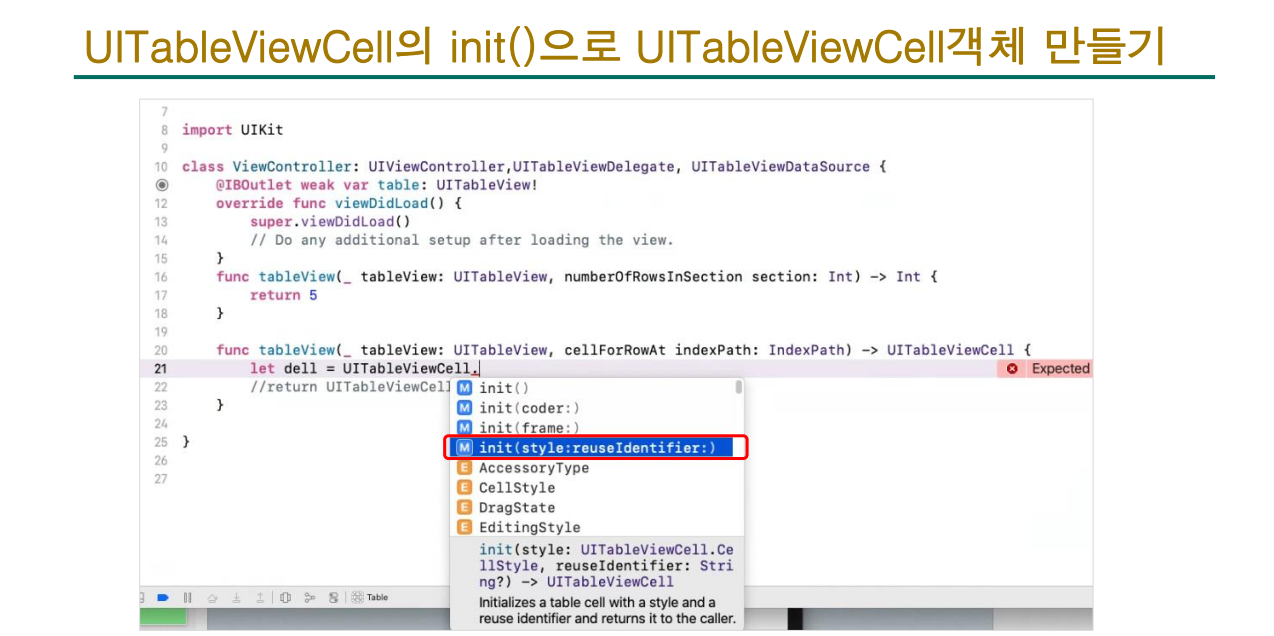
위 사진처럼 엔터를 누르면 왼쪽사진처럼 나오니, 오른쪽 사진처럼 수정하시면 됩니다.
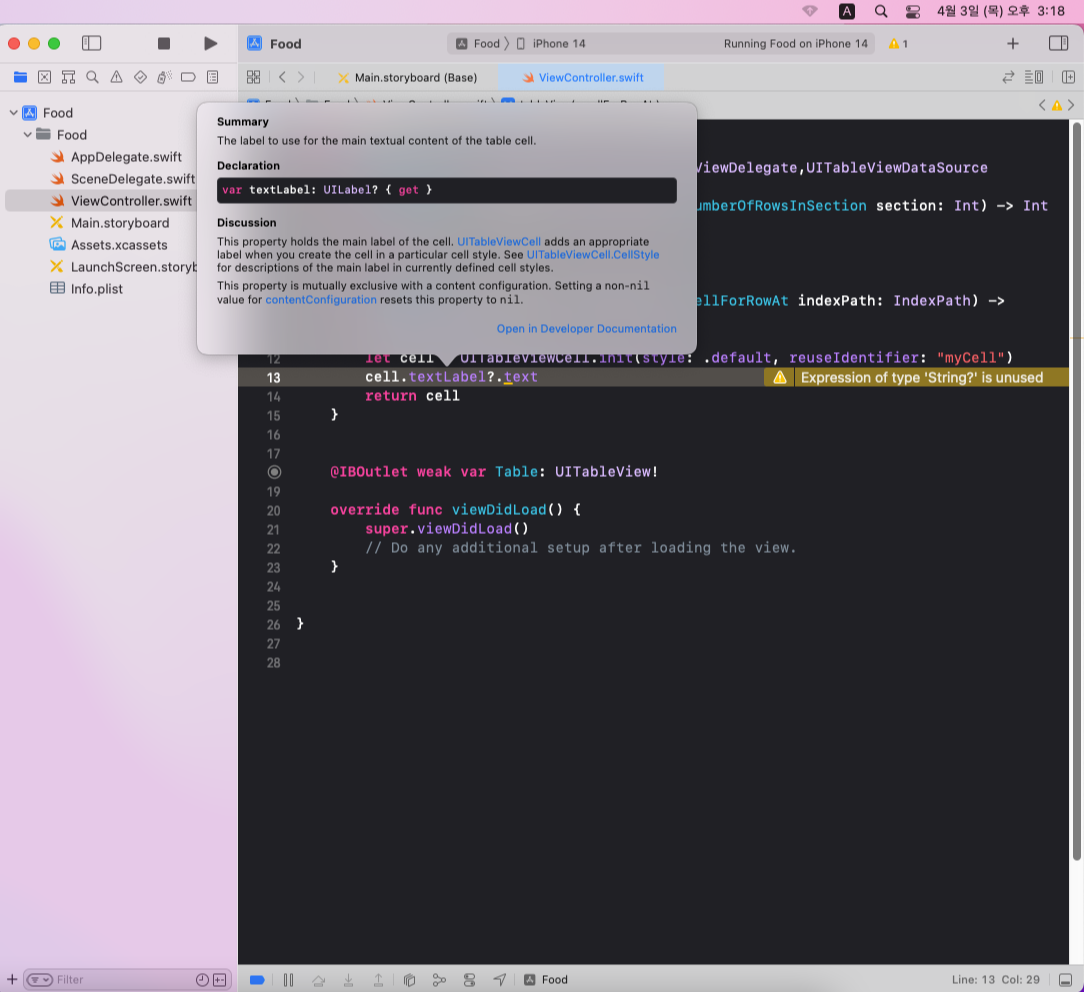
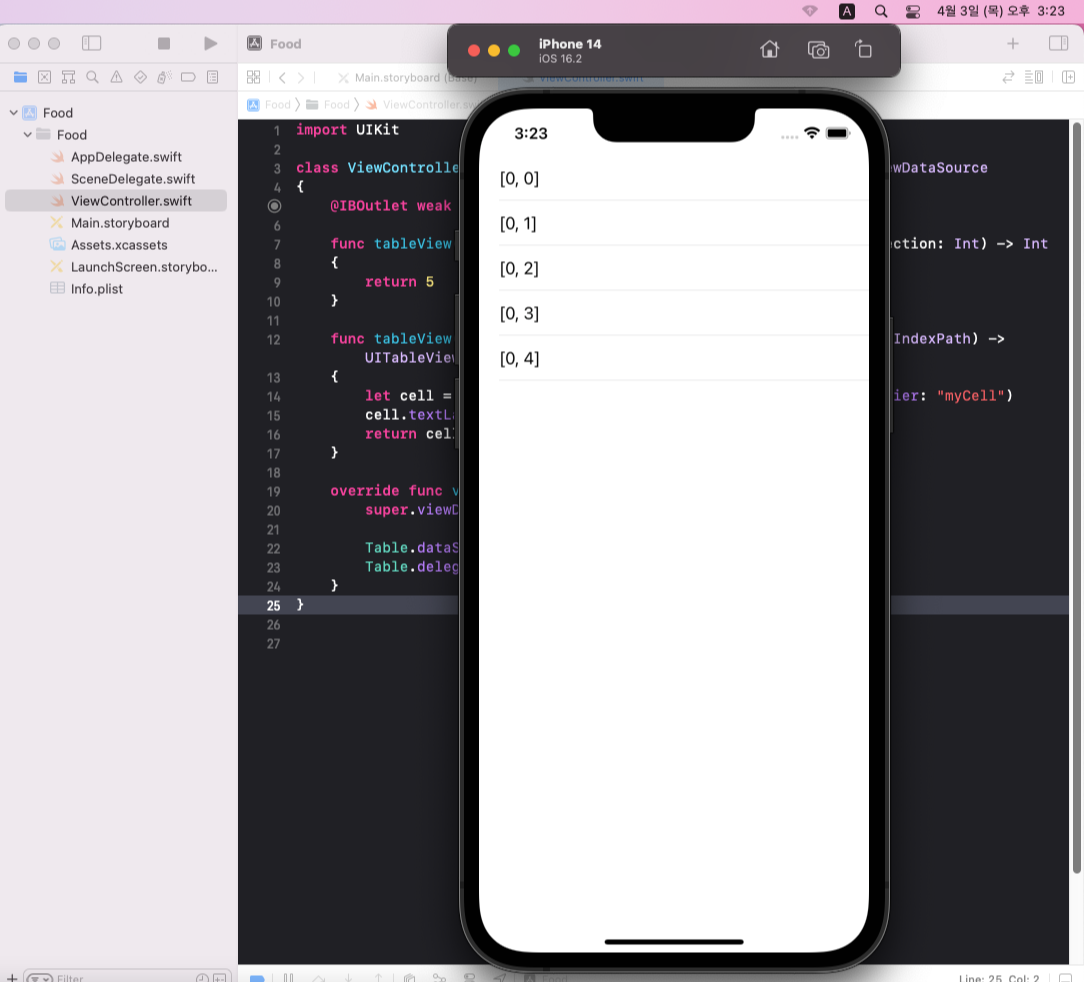
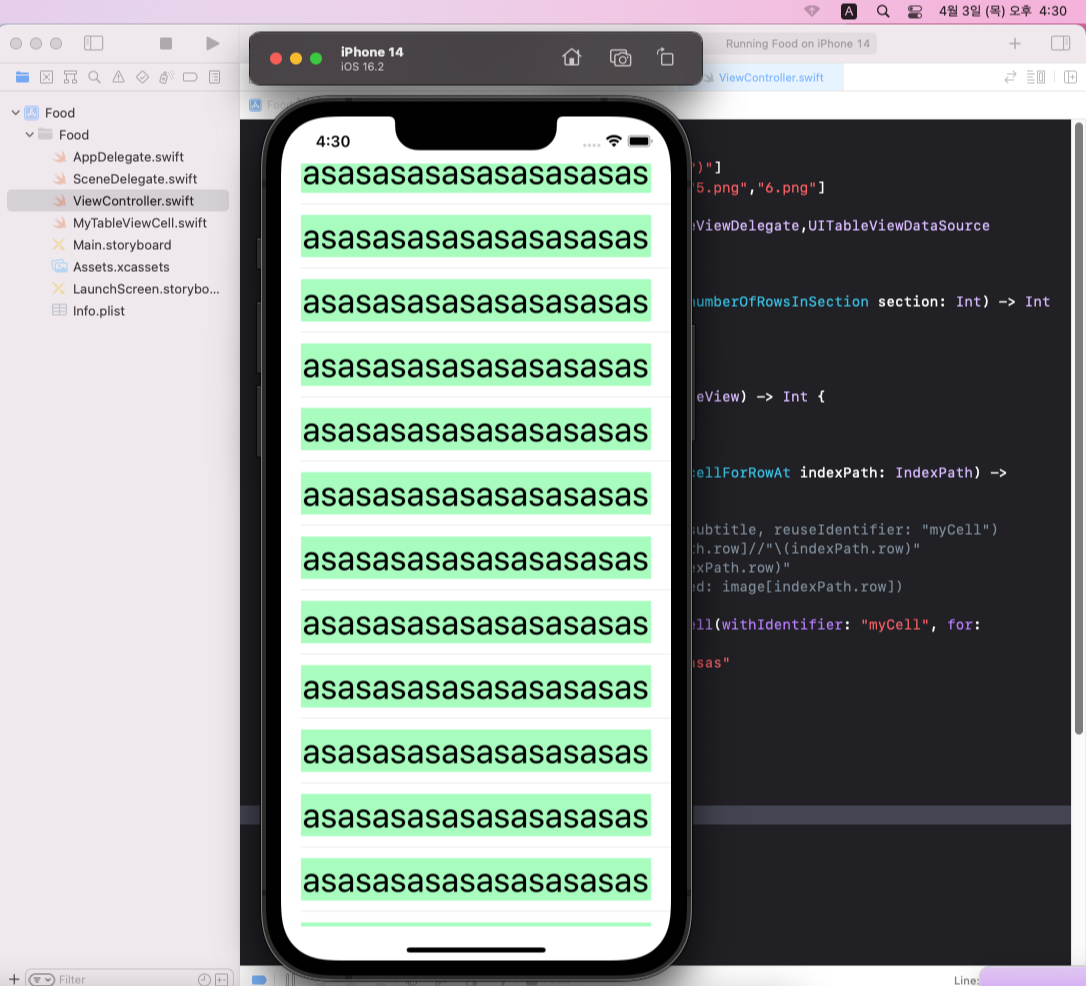
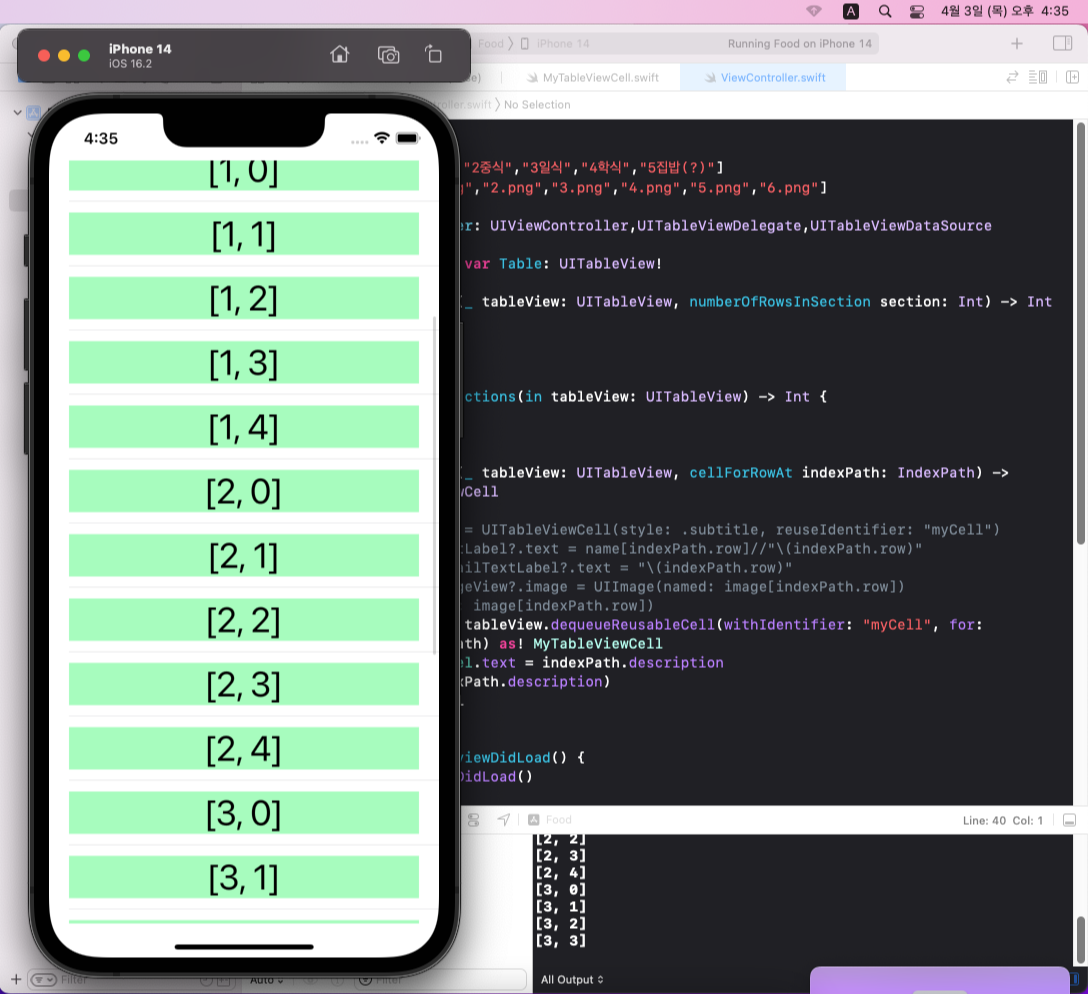
2-7. indexpath 출력해보기
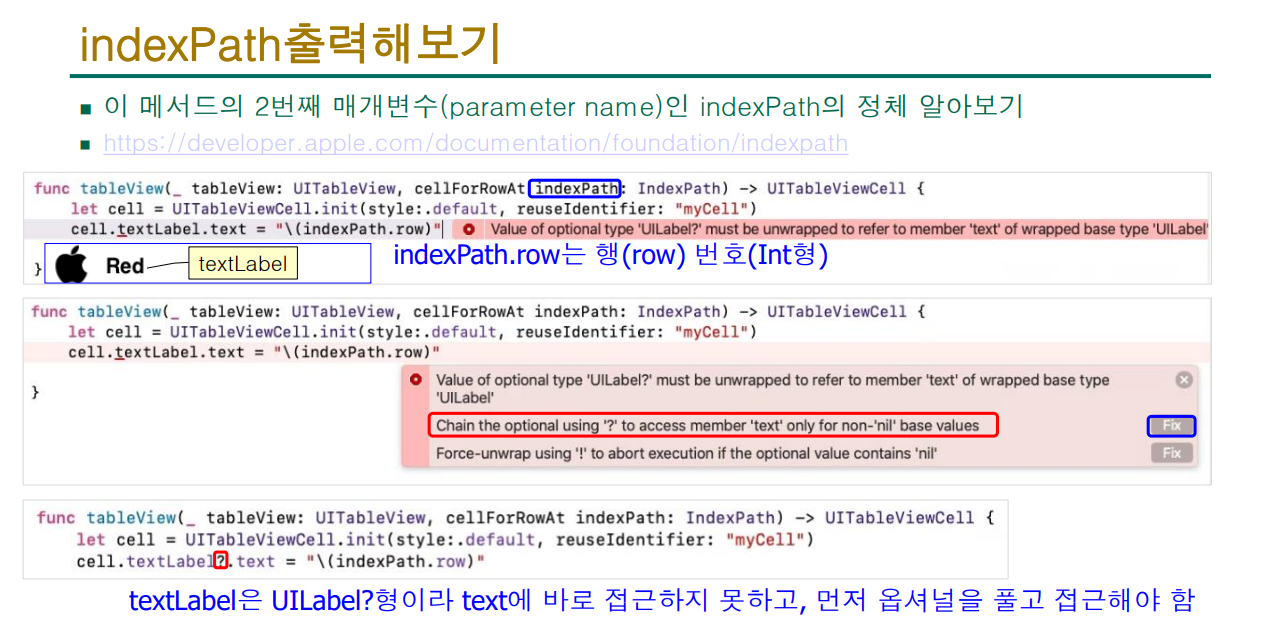
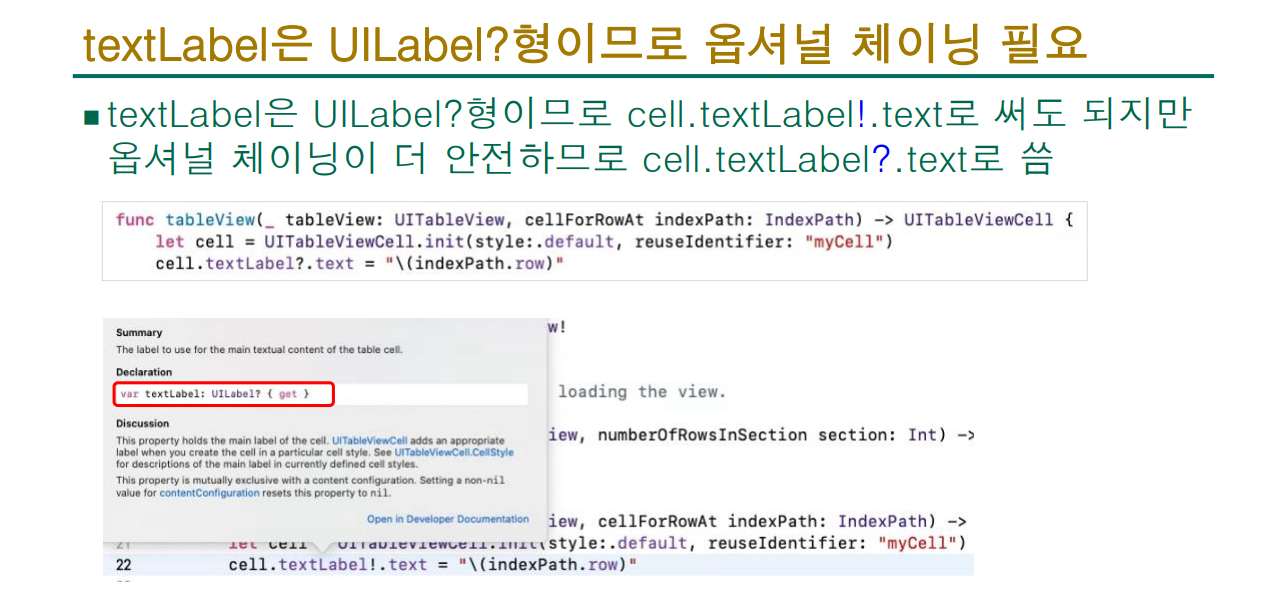
let을 사용해서 일반적으로 사용할수 있게 옵셔널 체이닝을 해줍니다.
(밑의 오류는 공백이 일정하지 않아서 그런것이므로 무시)
단, Table.datasource,delegate = self를 적지않으면 아무것도 나오지 않습니다.

실행시의 화면
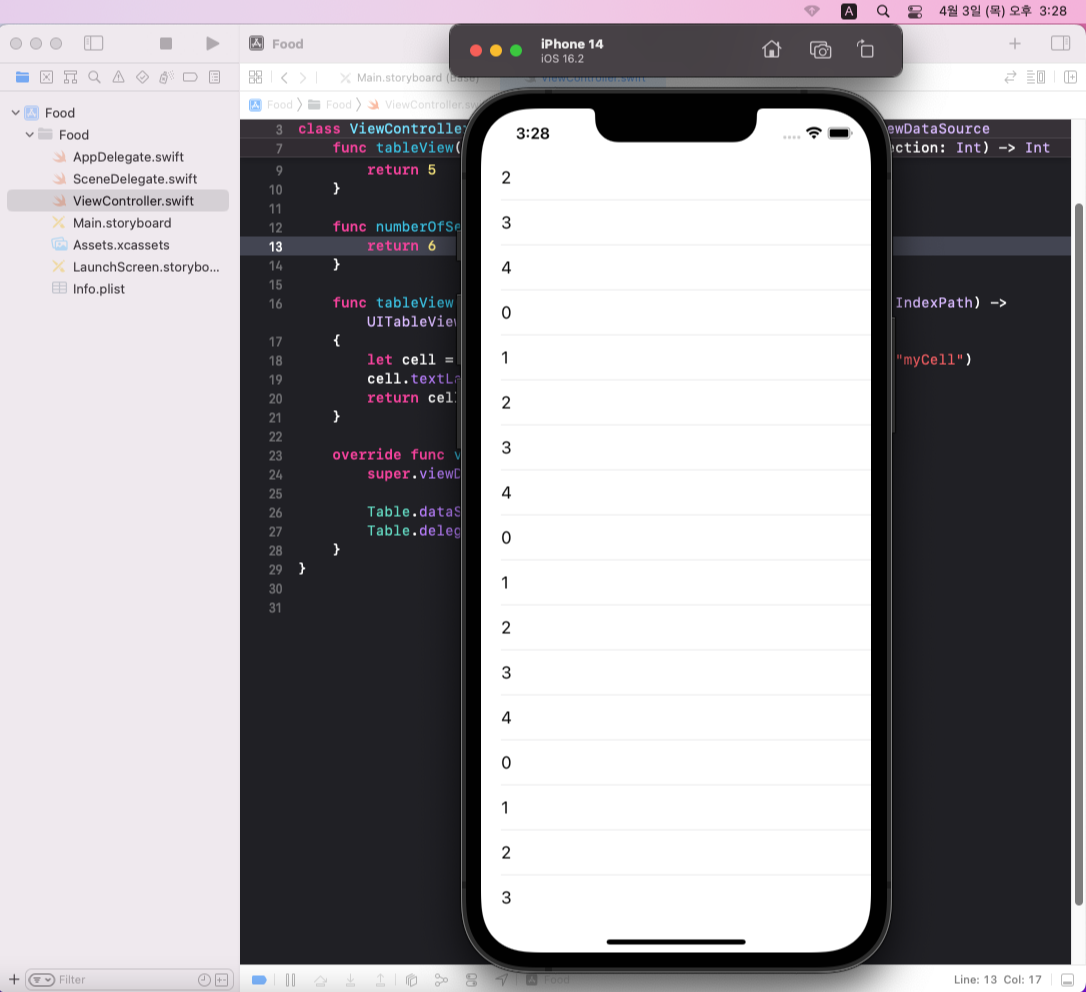
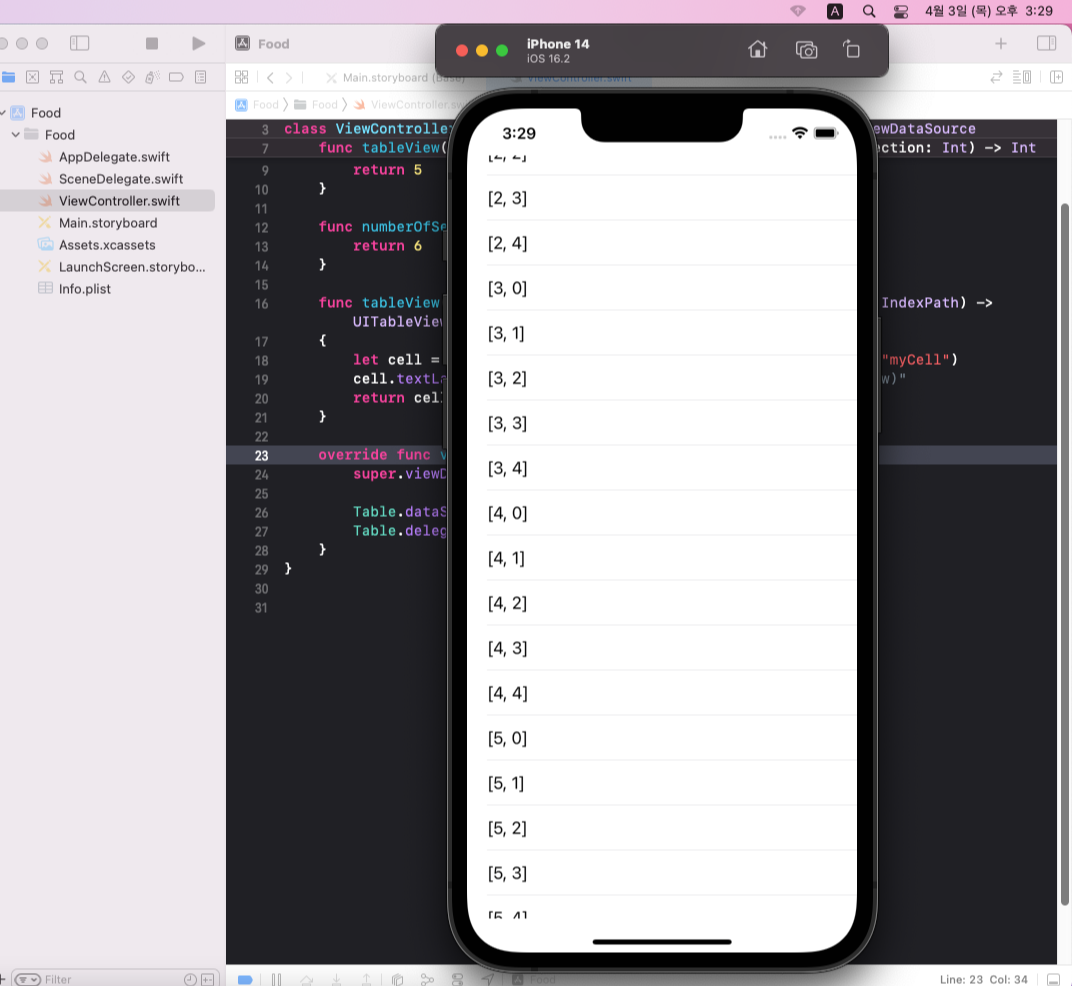
위의 프로토콜 리턴값을 바꾸면 여러개 나오게 하는것도 가능합니다.
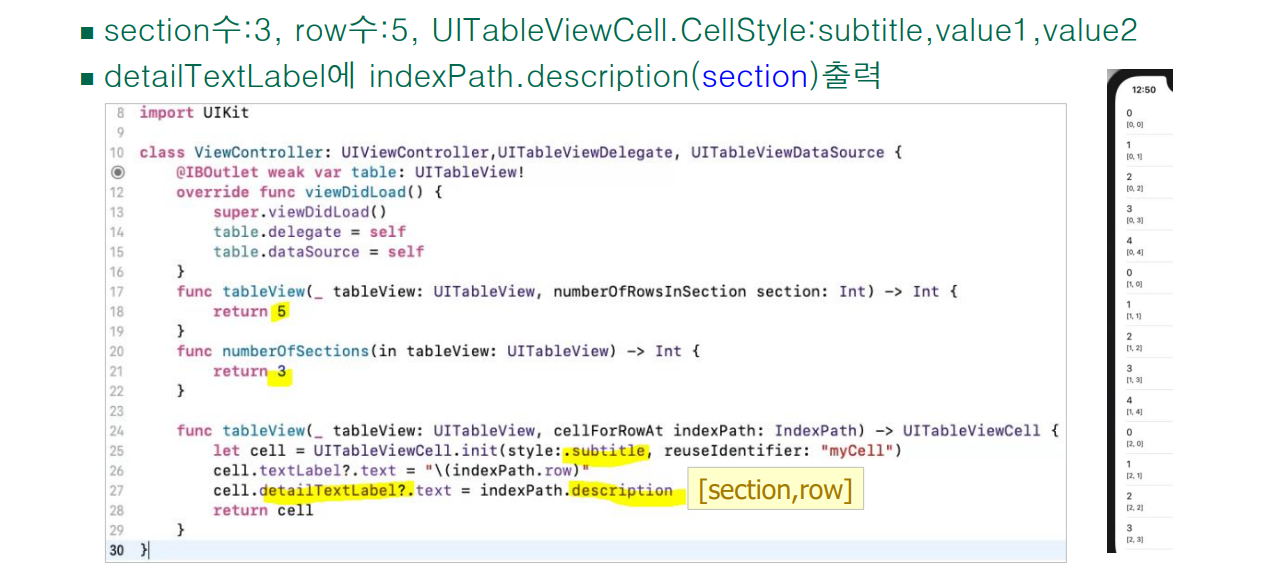
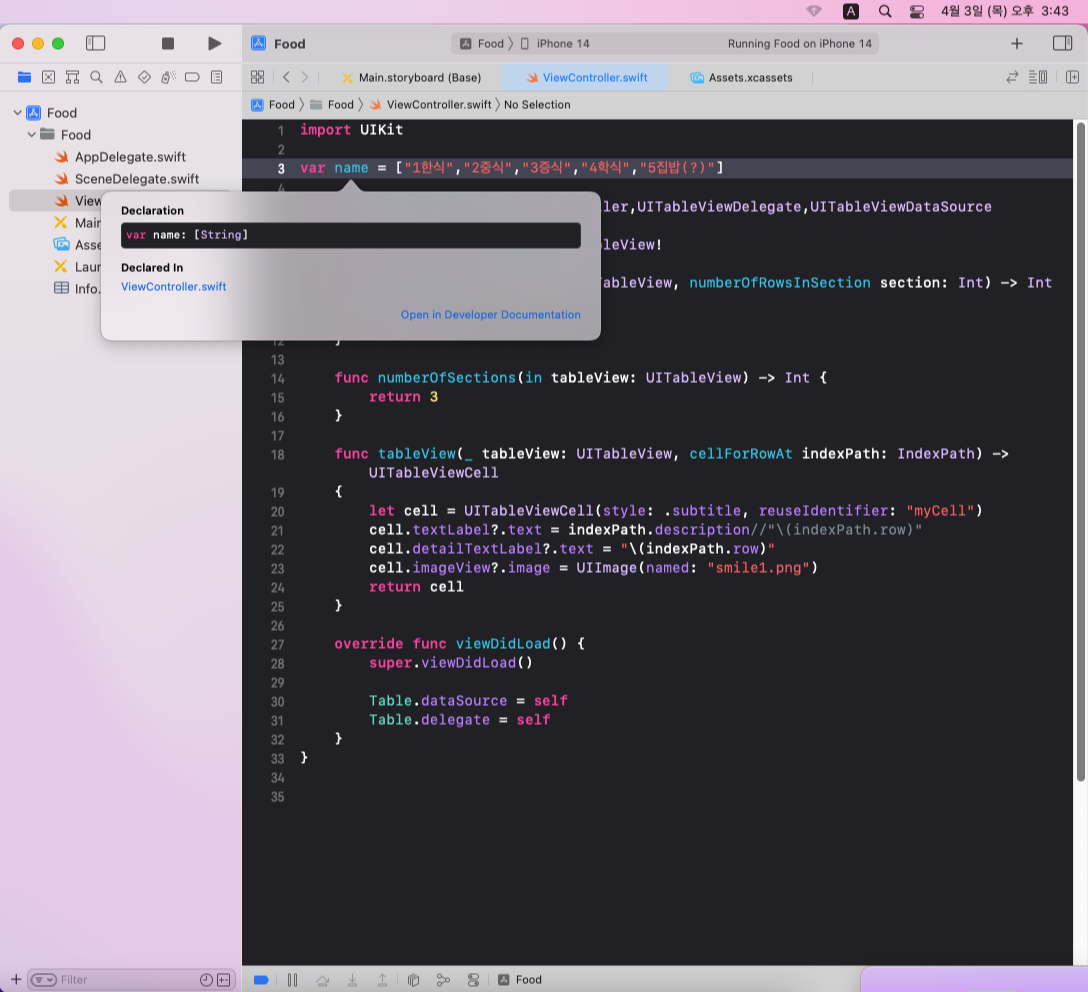
2-8. 부제목도 나오게 해보기

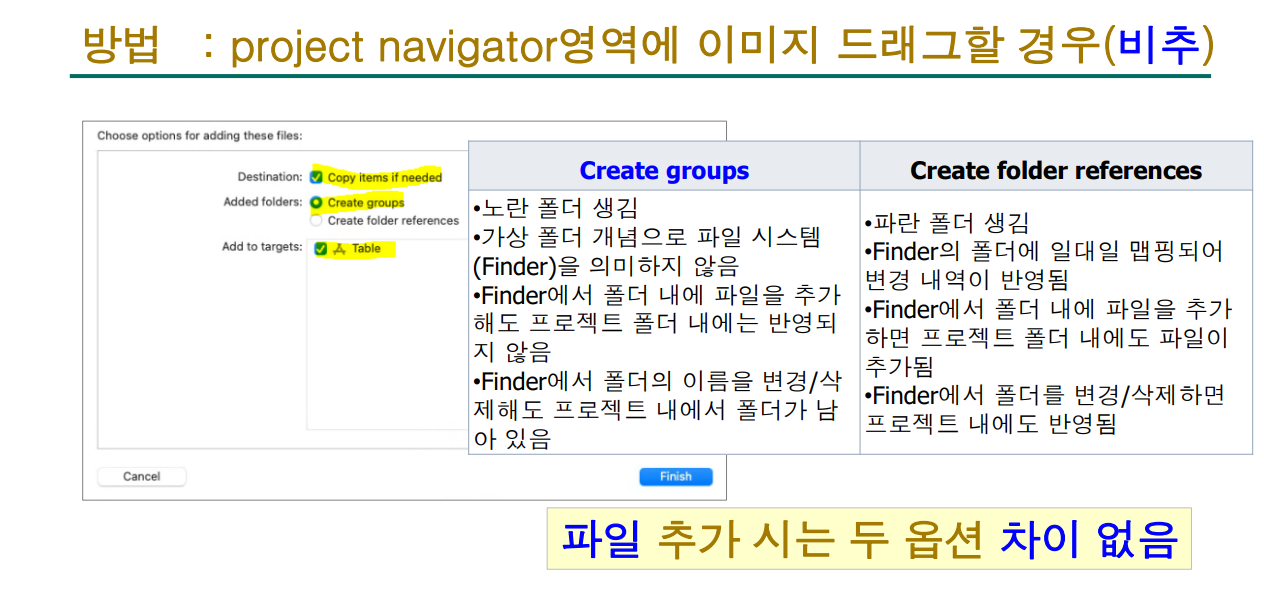
2-9. 이미지 넣는 2가지 방법
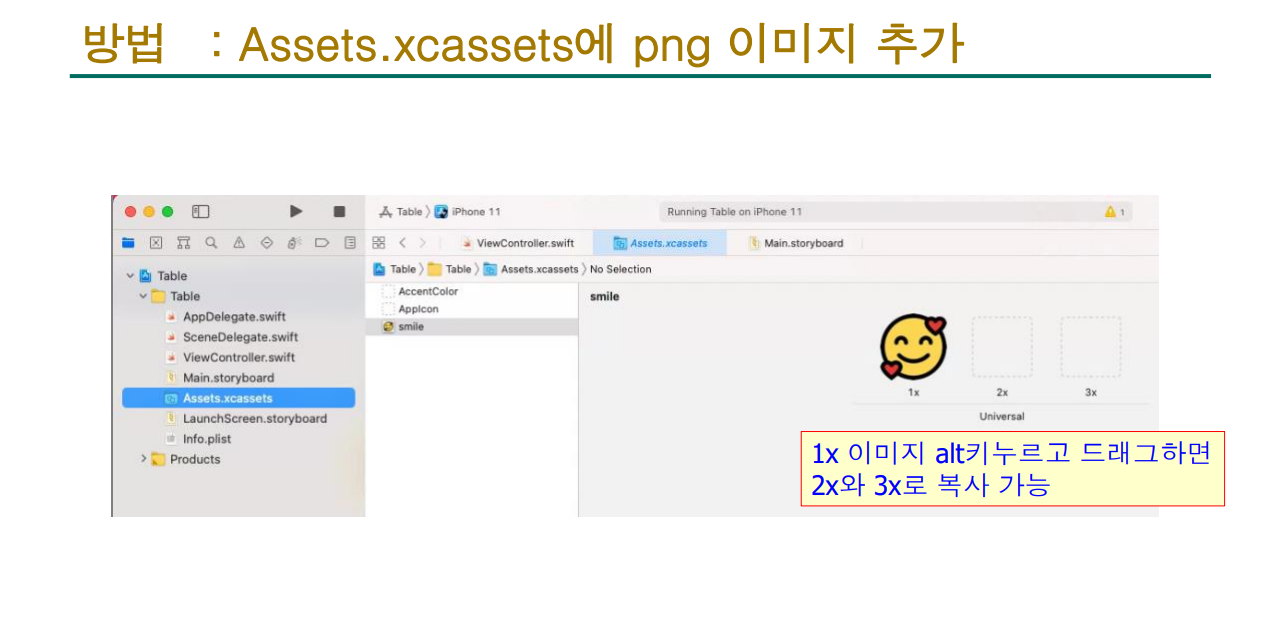
2-10. 이미지 바꾸기
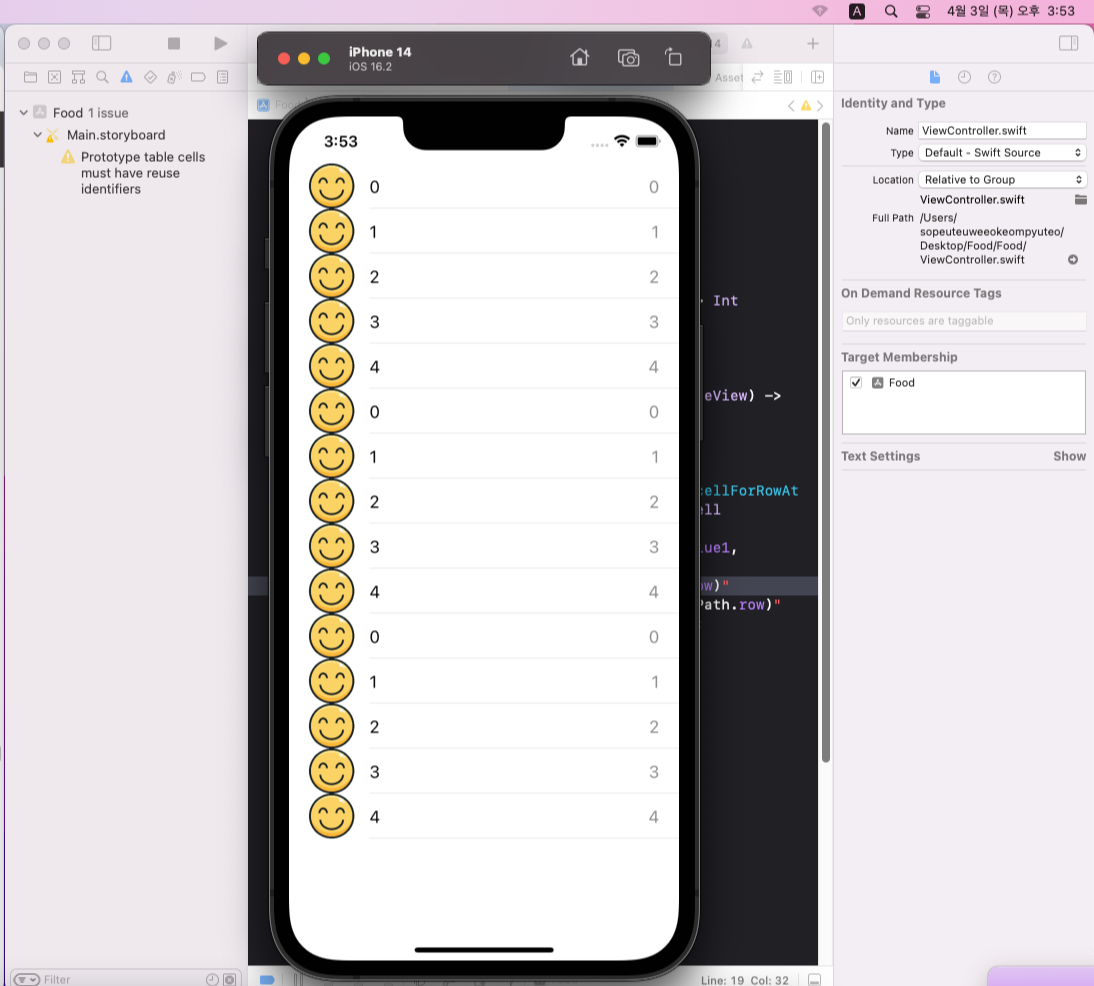
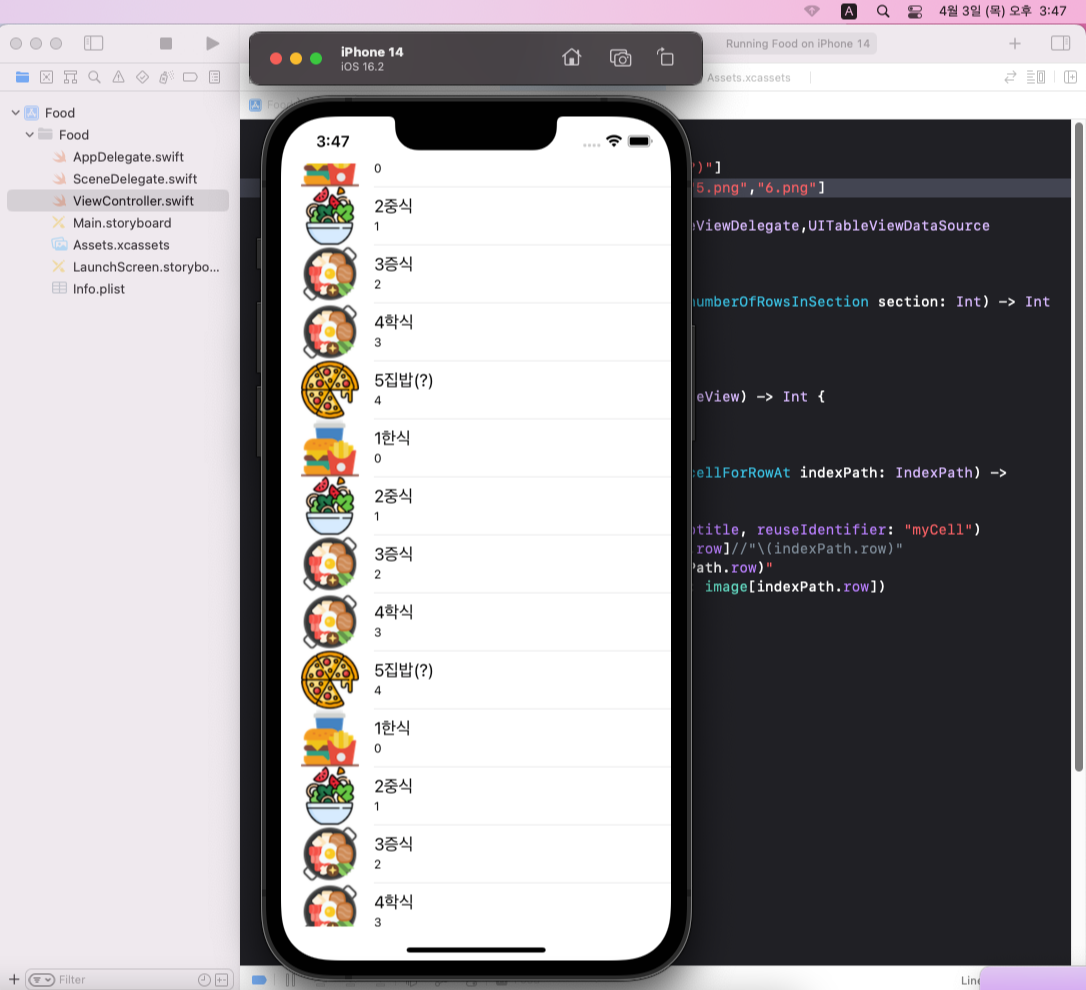
배열로 이름과 그렇듯한 음식사진을 대충 넣고 실행해보면?

이렇게 됩니다.
하지만 이렇게 탭만 넣어 만들면 뭔가 심심하니 효과도 넣어야겠죠?
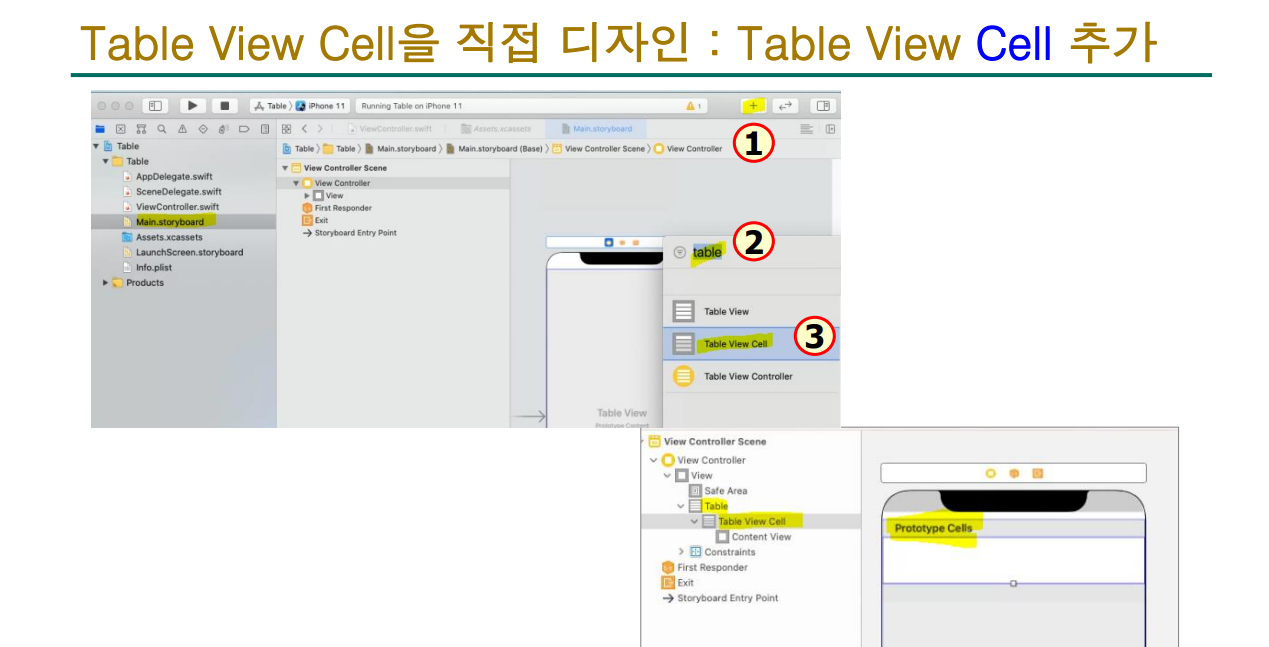
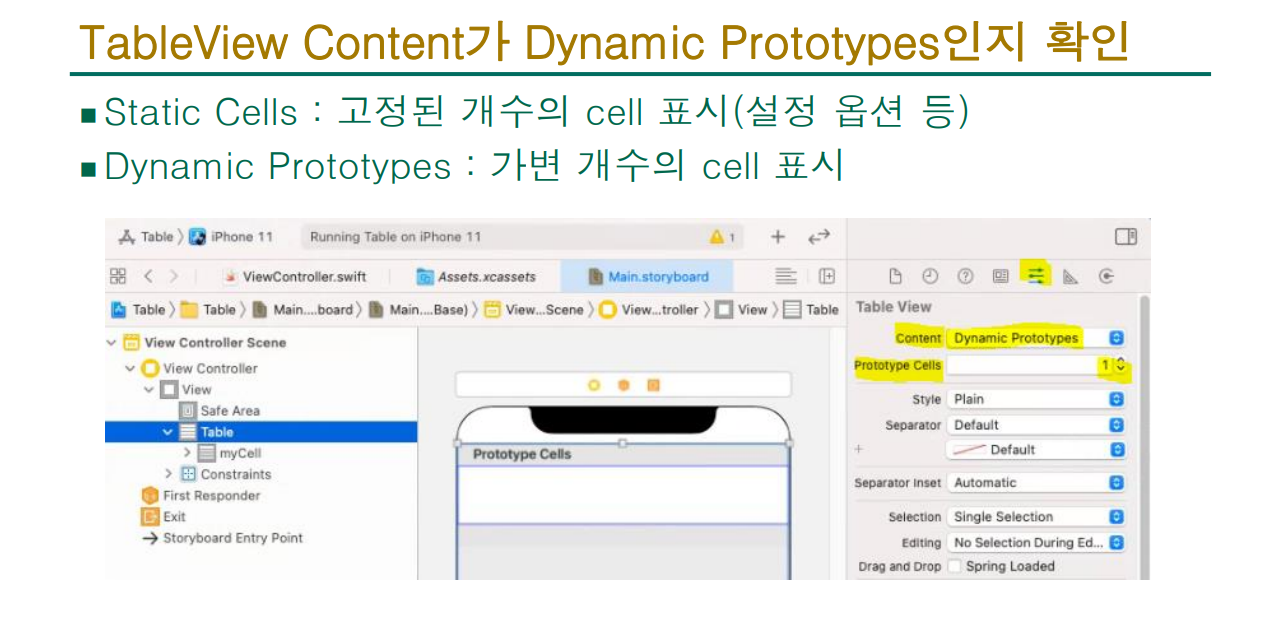
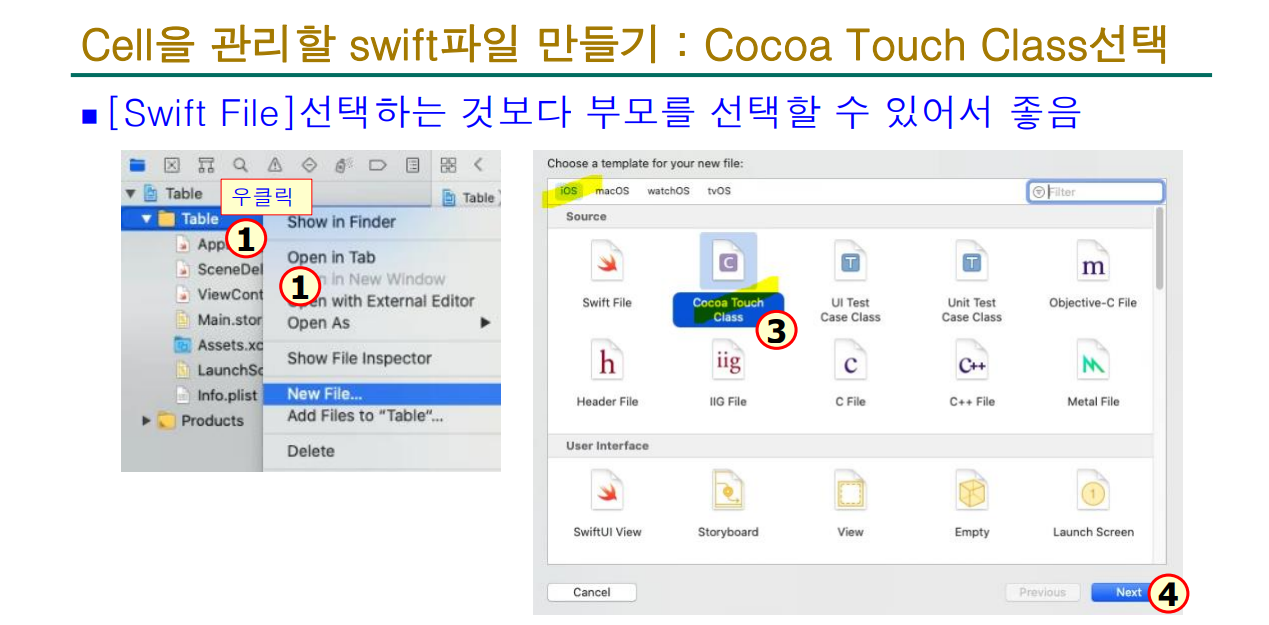
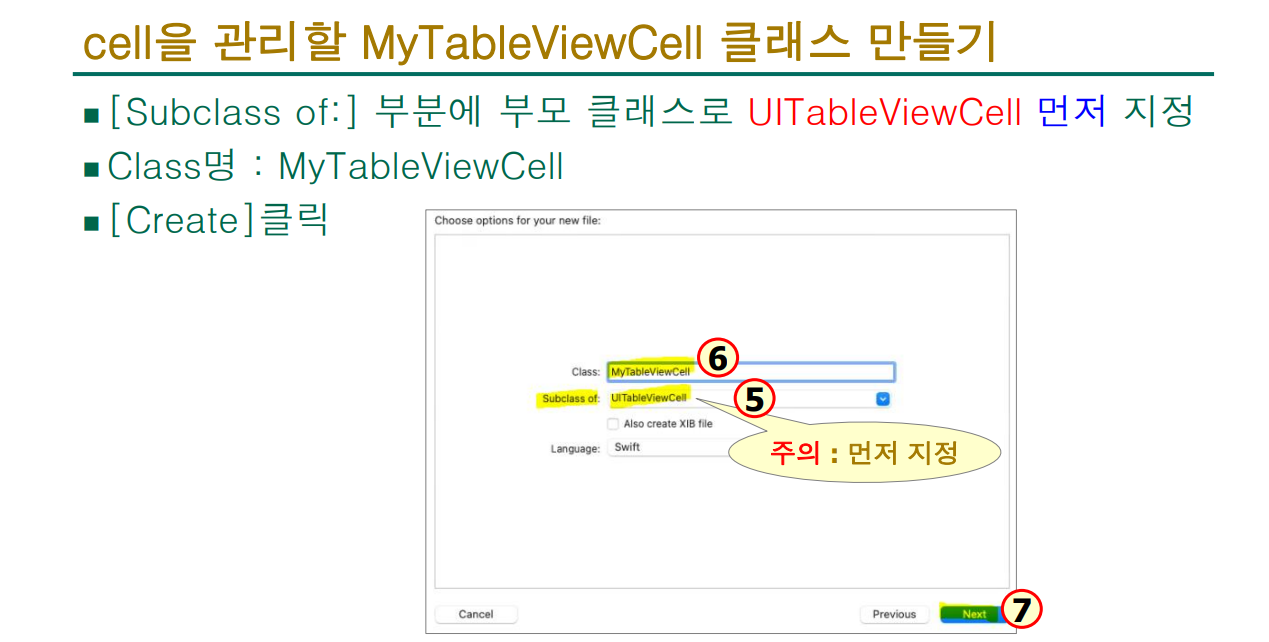
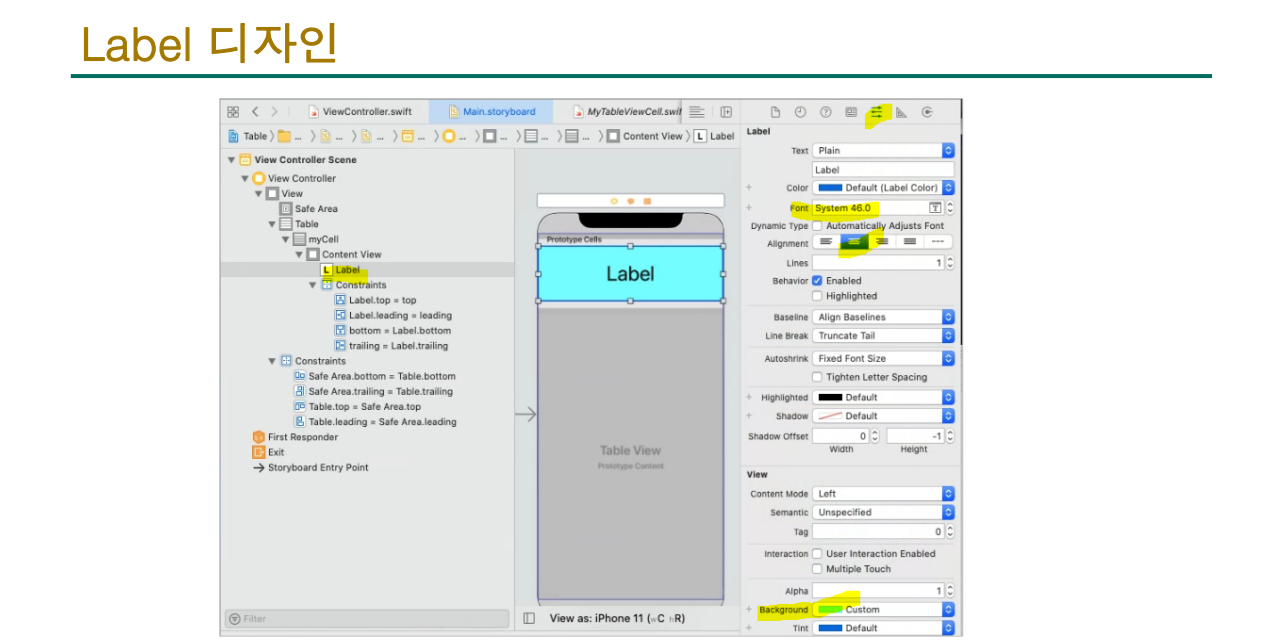
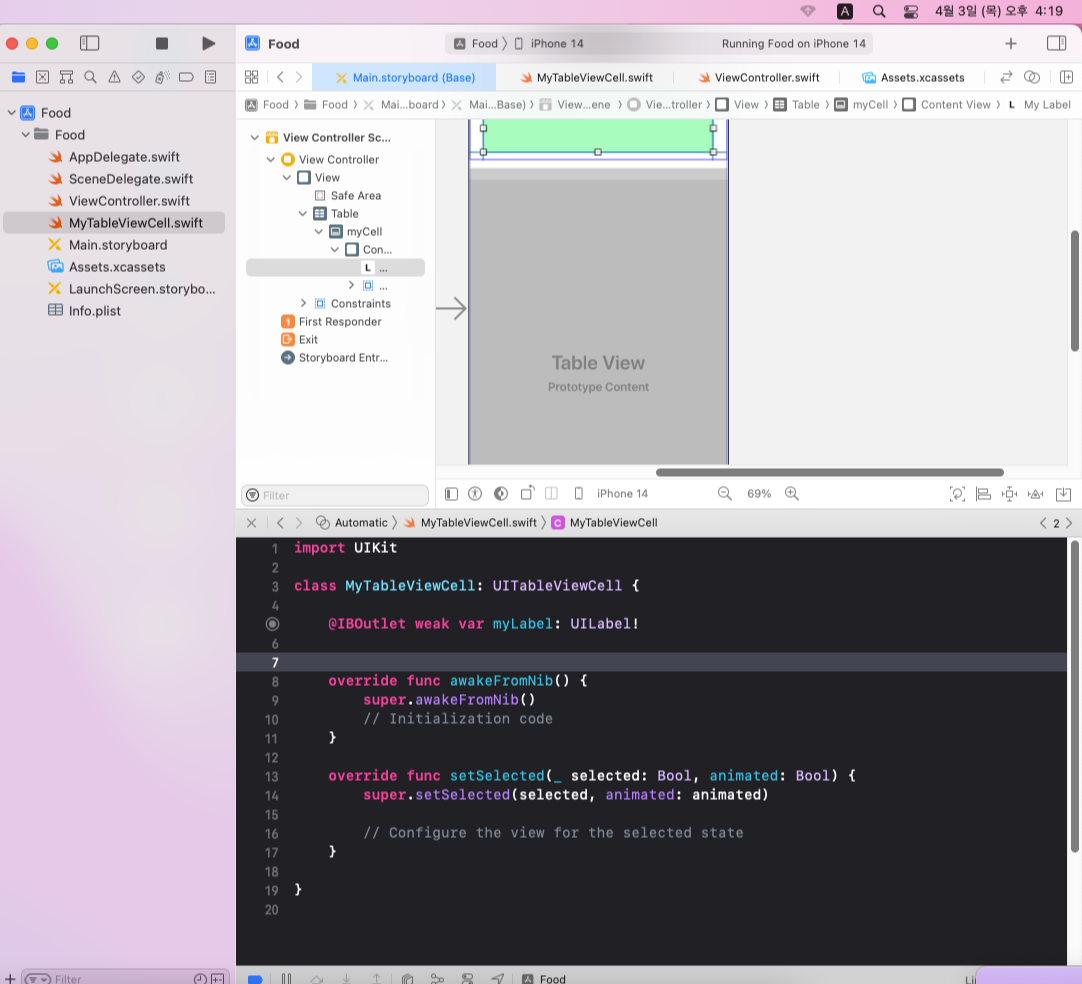
3-1. Table View cell 직접만들기
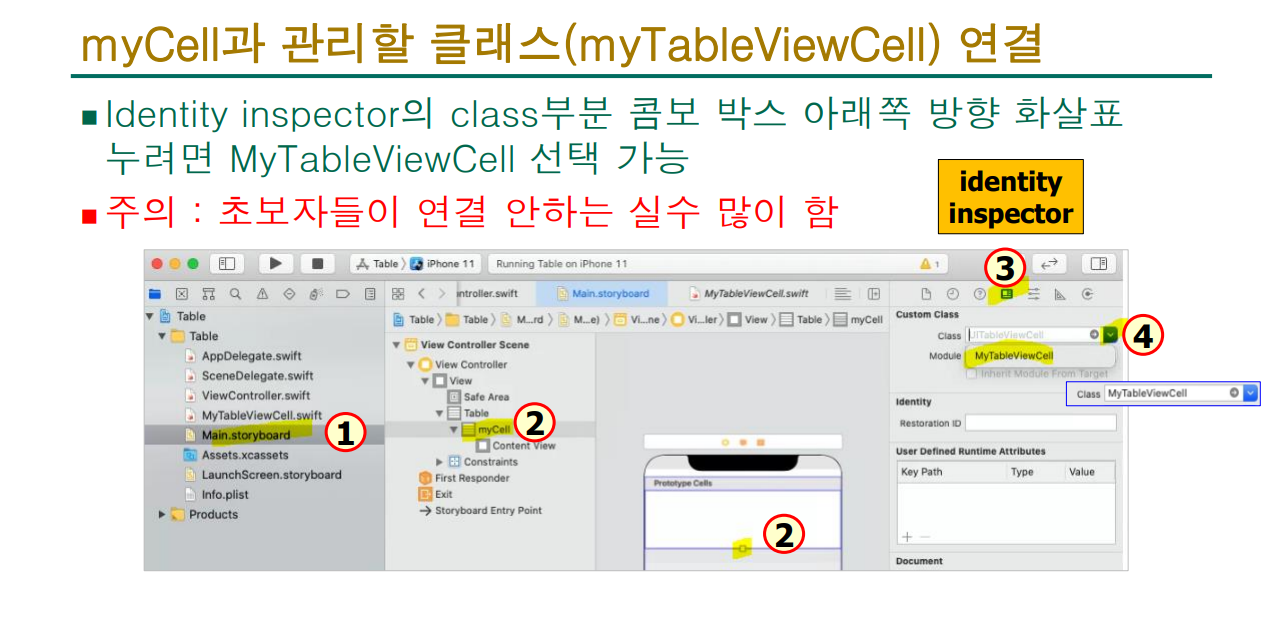
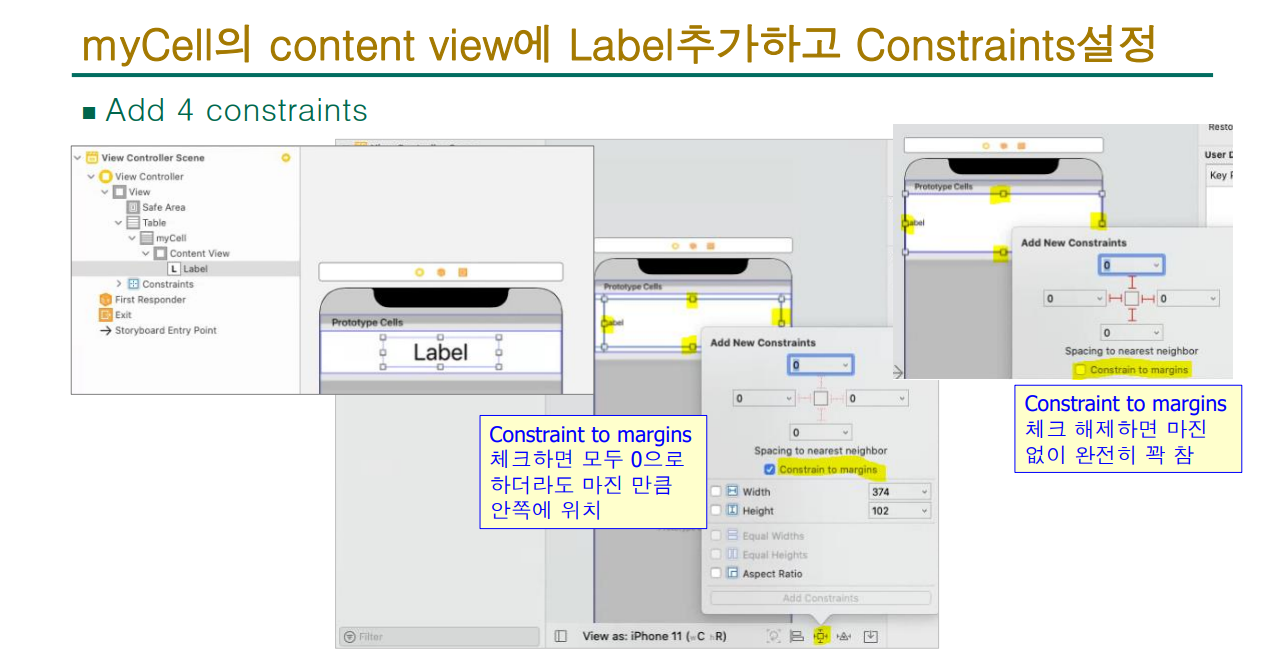
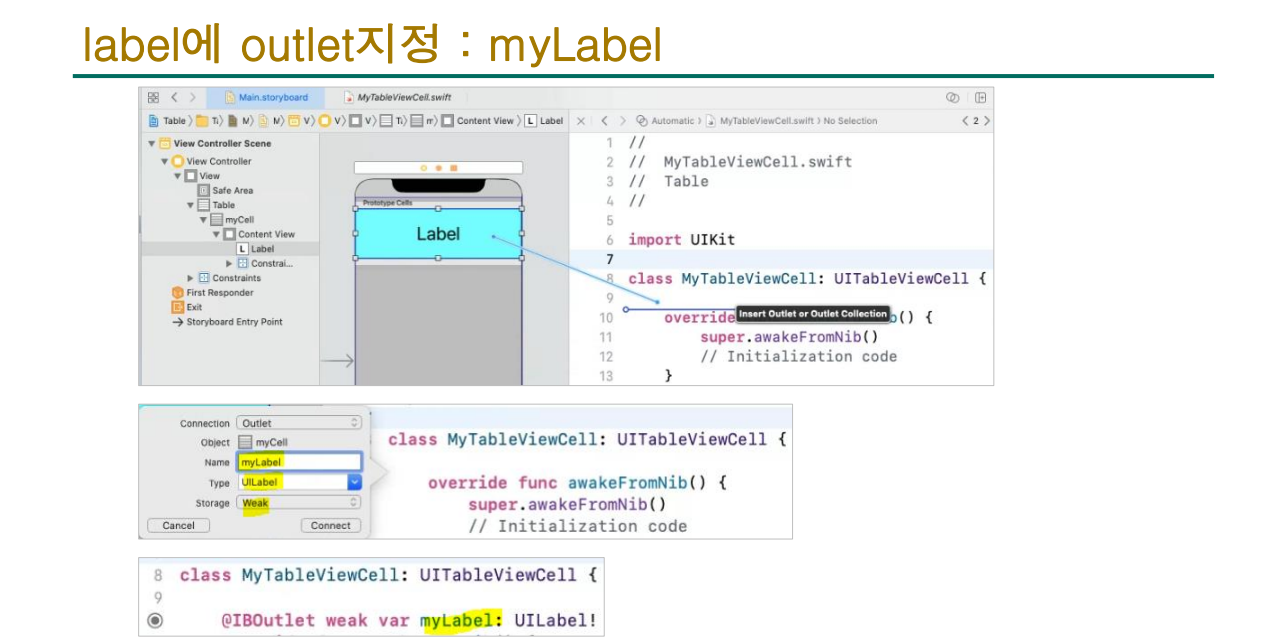
3-2. Label 만들고 연결하기
3-3. 데이터 소스를 요청할수 있게 수정하기

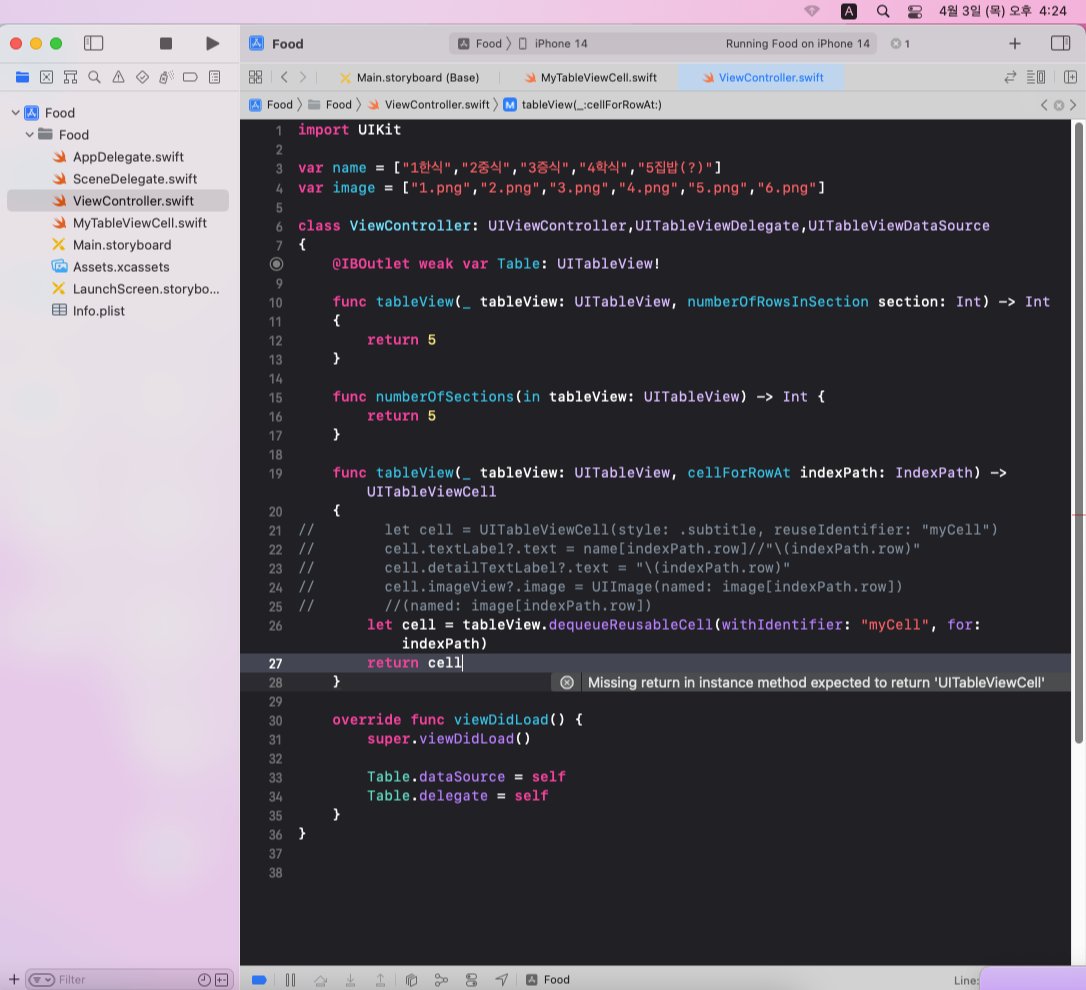
3-4. 부모 인스턴스를 자식 클래스로?
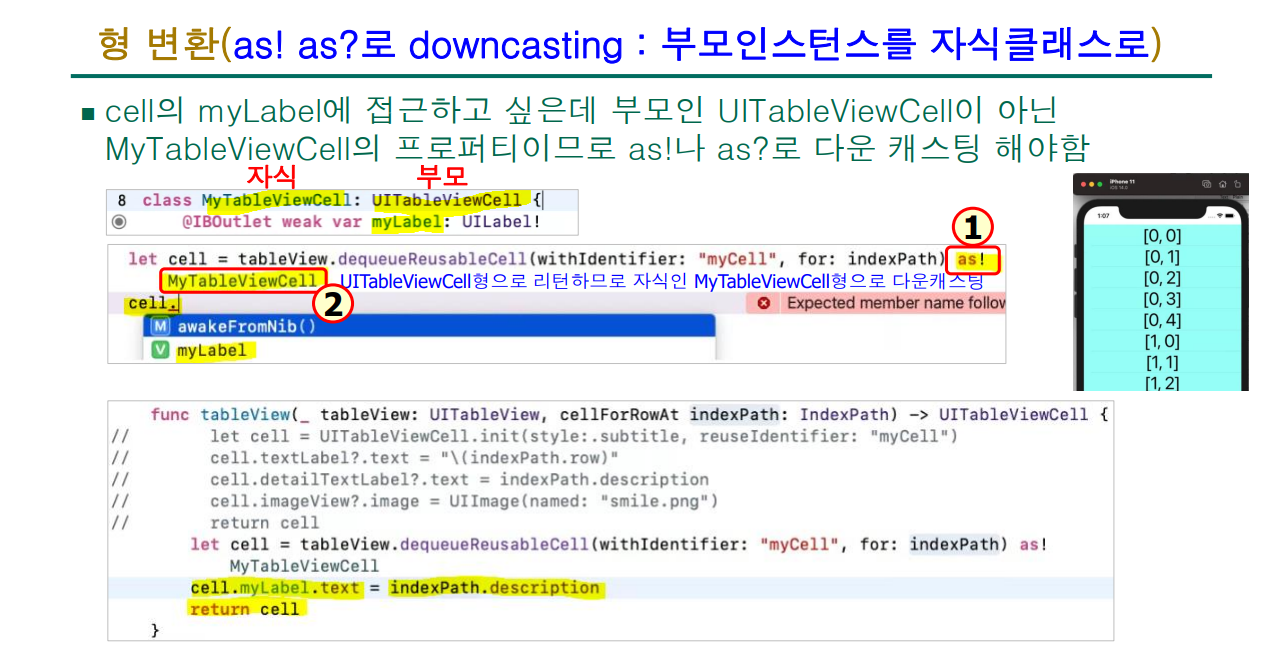
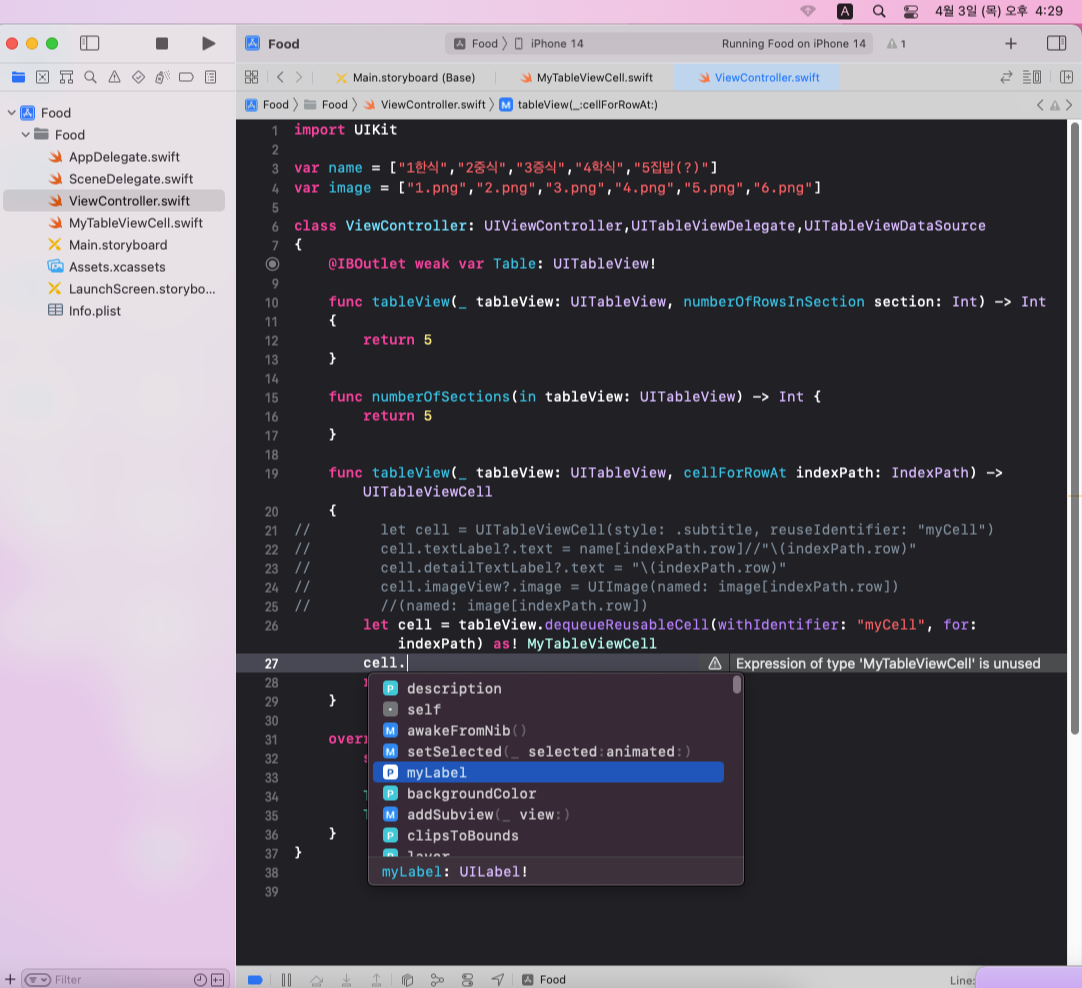
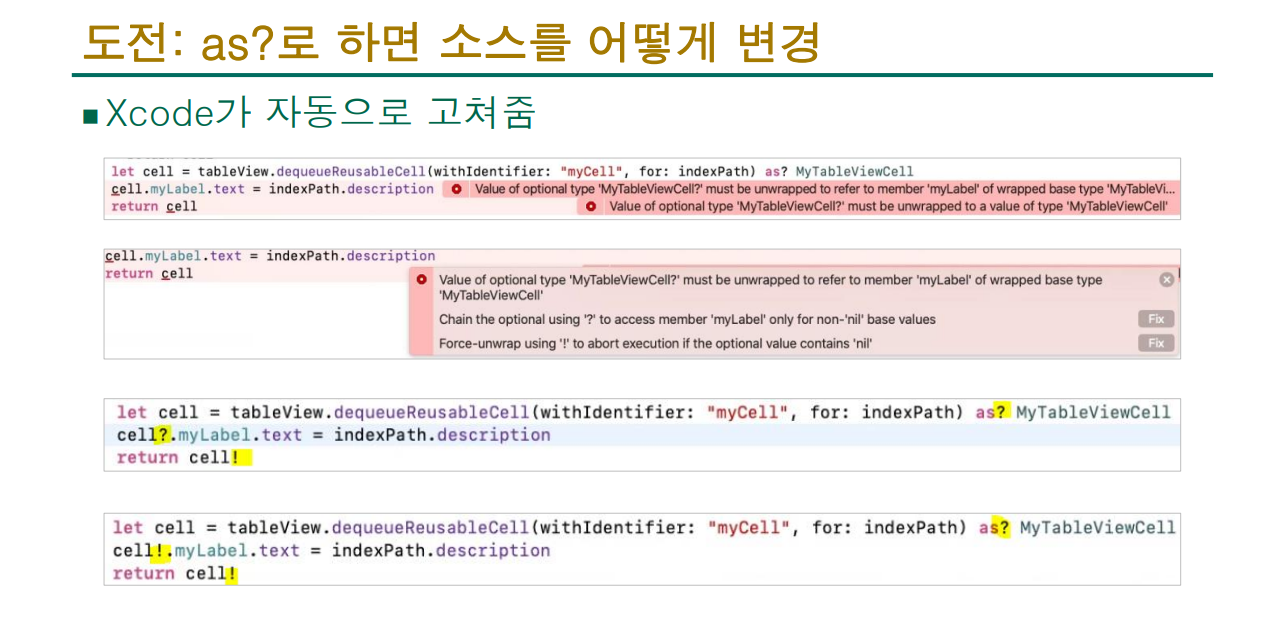
as?는 값이 없을수 있다는뜻일때 사용하지만, 부모인스턴스는 사실상 암묵적인 값을 가지고 있으니 !로 바꾸라고 뜹니다.
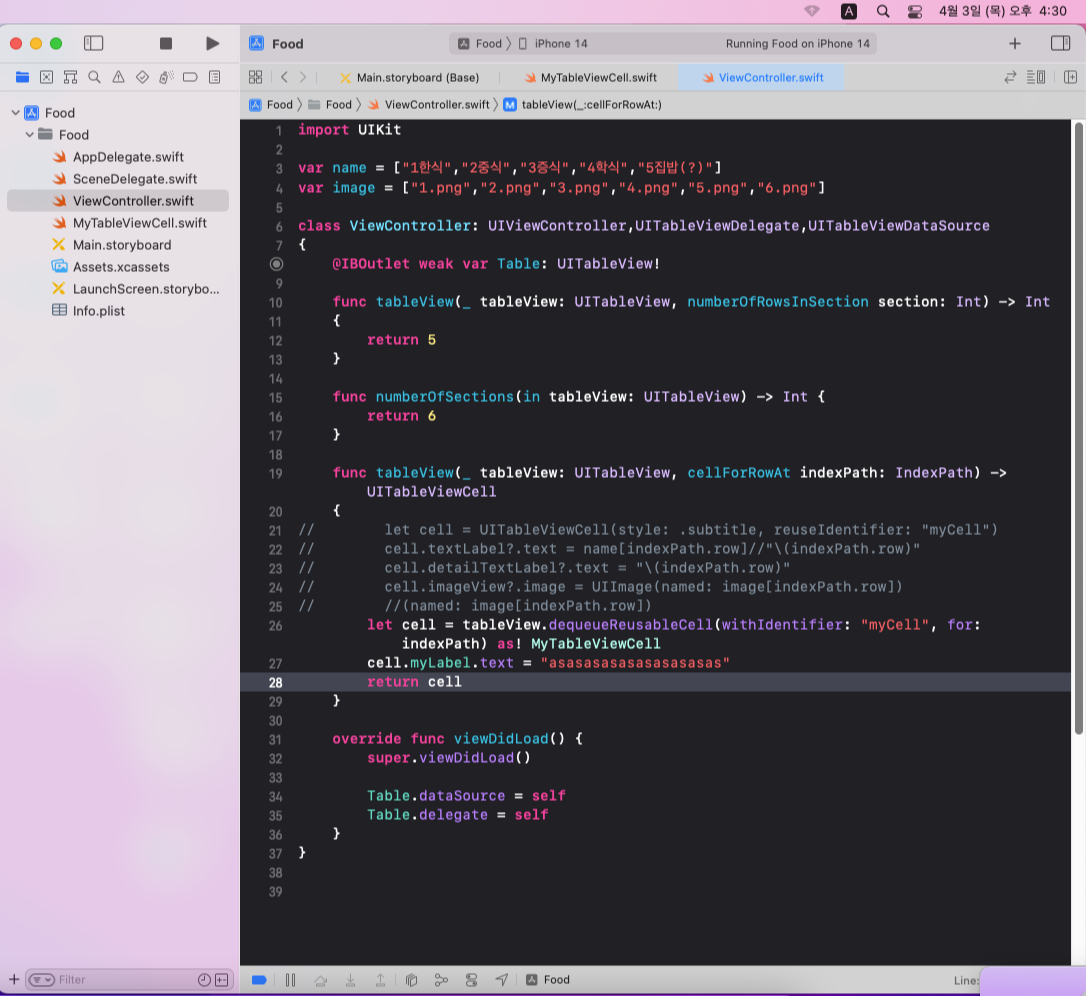
아무거나 입력하고 실행하면 이렇게 됩니다.
3-5. _: cellForRowAt: vs _:didSelectRowAt: 무슨 차이?

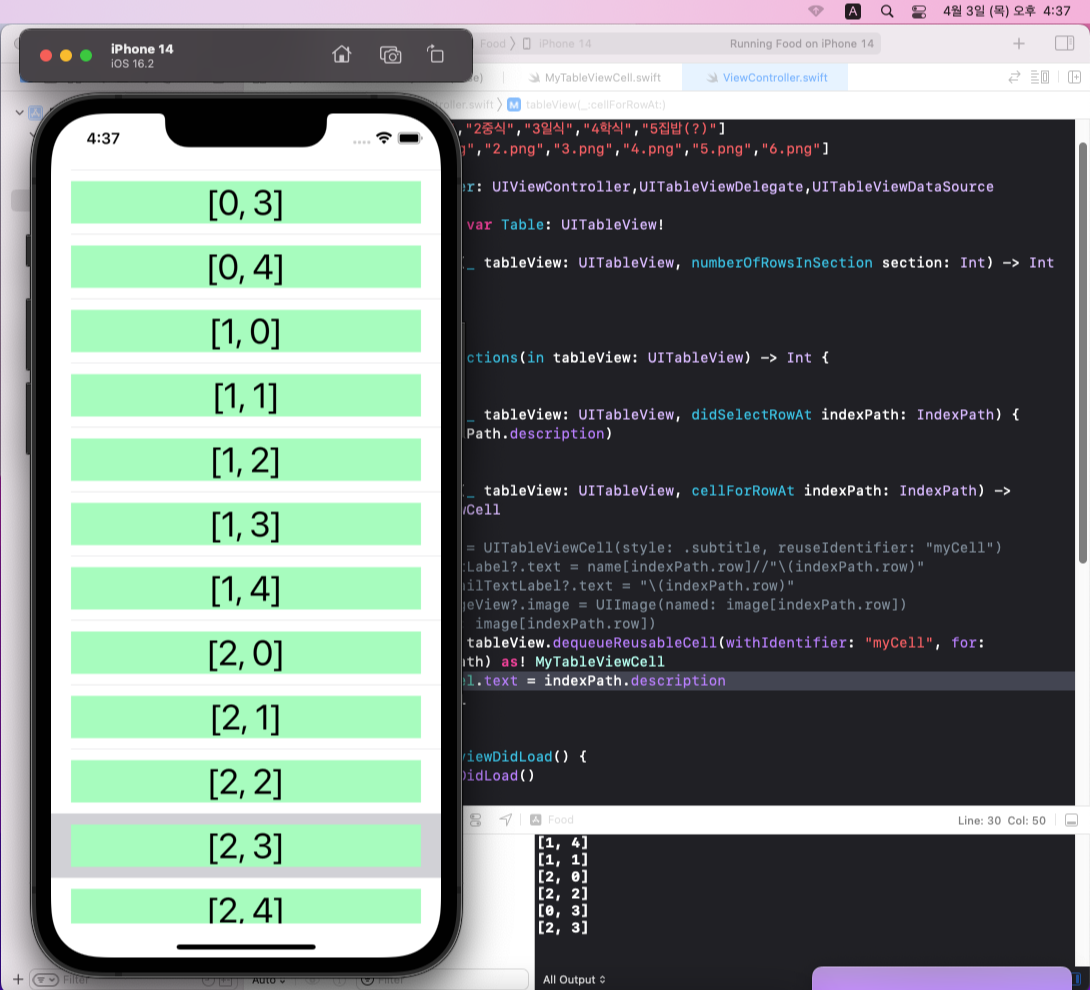
보기엔 잘모르겠지만, 정말로 큰 차이가 존재합니다.
cellForRowAt: 는 스크롤할때마다 메서드들을 계속해서 호출하지만,
didSelectRowAt: 는 스크롤할때 호출하지 않고, 본인이 클릭한것만 호출한다는 큰 차이가 있습니다.
밑의 코드블럭은 사용된 종합 코드입니다.
import UIKit

var name = ["1한식","2중식","3일식","4학식","5집밥(?)"]
var image = ["1.png","2.png","3.png","4.png","5.png","6.png"]

class ViewController: UIViewController,UITableViewDelegate,UITableViewDataSource
{
    @IBOutlet weak var Table: UITableView!

    func tableView(_ tableView: UITableView, numberOfRowsInSection section: Int) -> Int
    {
        return 5
    }

    func numberOfSections(in tableView: UITableView) -> Int {
        return 6
    }
    func tableView(_ tableView: UITableView, didSelectRowAt indexPath: IndexPath) {
        print(indexPath.description)
    }

    func tableView(_ tableView: UITableView, cellForRowAt indexPath: IndexPath) -> UITableViewCell
    {
//        let cell = UITableViewCell(style: .subtitle, reuseIdentifier: "myCell")
//        cell.textLabel?.text = name[indexPath.row]//"\(indexPath.row)"
//        cell.detailTextLabel?.text = "\(indexPath.row)"
//        cell.imageView?.image = UIImage(named: image[indexPath.row])
//        //(named: image[indexPath.row])
        let cell = tableView.dequeueReusableCell(withIdentifier: "myCell", for: indexPath) as! MyTableViewCell
        cell.myLabel.text = indexPath.description
        cell.myImage.image = UIImage(named: image[indexPath.row])
        //print(indexPath.description)
        return cell
    }

    override func viewDidLoad() {
        super.viewDidLoad()

        Table.dataSource = self
        Table.delegate = self
    }
}

///MyTableViewCell.swift
import UIKit

class MyTableViewCell: UITableViewCell {

    @IBOutlet weak var myLabel: UILabel!

    @IBOutlet weak var myImage: UIImageView!

    override func awakeFromNib() {
        super.awakeFromNib()
        // Initialization code
    }

    override func setSelected(_ selected: Bool, animated: Bool) {
        super.setSelected(selected, animated: animated)

        // Configure the view for the selected state
    }

}'실무 (iOS)' 카테고리의 다른 글
| iOS프로그래밍 실무 (6주차) [옵셔널 체이닝 , Error handling , generic , array] (0) | 2025.04.10 |
|---|---|
| iOS프로그래밍 실무 (4주차) [함수,클래스,프로토콜] (0) | 2025.03.27 |
| iOS프로그래밍 실무[3주차] 앱 만들기 복습 (0) | 2025.03.25 |
| iOS 프로그래밍 실무 (2주차) [자료형,Tuple,Optional,연산자,제어문, 그 외 기타] (0) | 2025.03.15 |
| iOS 프로그래밍 실무 [1주차] (0) | 2025.03.09 |


댓글